In this tutorial, we will discuss the complete steps to use the chrome://net-internals/#dns command to clear the Google Chrome DNS cache.
In some cases, you are unable to access the website on the Google Chrome browser due to the outdated DNS or changed DNS entry.
In this case, clearing the DNS cache works for you to solve the problem. So keep reading the article to learn more about it.
Quick Navigations:
What is //net-internals/#dns?
The //net-internals/#dns is also called Net-internals, which is a NetLog event stream visualizer, through which you can monitor the real-time logs or post-dated NetLog dumps. This NetLog dump file saves all the network-based events and logs. This log file can be used to analyse and fix the DNS issues in Chrome.
In addition, this //net-internals/#dns functions on some Chromium-based browsers like Microsoft Edge, Opera, Chrome etc. So, if you want to clear the host cache, you can just type [browser name]://net-internals/#dns in the address bar. Similarly to clear the socket pools, type [browser name]://net-internals/#sockets in the address bar.
To repair corrupted Windows system files, we recommend Advanced System Repair:
This software is your one stop solution to fix Windows errors, protect you from malware, clean junks and optimize your PC for maximum performance in 3 easy steps:
- Download Advanaced System Repair rated Excellent on Trustpilot.
- Click Install & Scan Now to install & scan issues causing the PC problems.
- Next, click on Click Here to Fix All Issues Now to fix, clean, protect and optimize your PC effectively.
What is Chrome://net-internals/#dns?
The Chrome://net-internals/#dns is a Google Chrome web browser internal page that delivers complete information and tools related to DNS.
Typing the “chrome://net-internals/#dns” in the Chrome browser opens the DNS-related activities information such as DNS sockets, DNS cache, Proxy, Socket Pools, etc.
Well, this is mainly used by advanced users and developers for analysing and solving DNS-related issues in Chrome.
How to Use Chrome://net-internals/#dns Command to Clear DNS Cache on Windows, macOS, Linux?
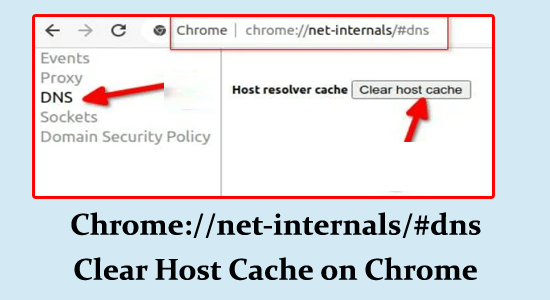
- On your OS launch Chrome web browser and type or copy/paste chrome://net-internals/#dns in the address bar. Hit Enter.
- Now, click on the Clear Host cache button.
- Restart Chrome and navigate to the chrome://net-internals/#sockets page to flush the socket pools.

If you cannot clear the DNS cache following the listed instructions, try following the below-listed solutions to fix the problem.
How to Use chrome://net-internals/#dns mobile?
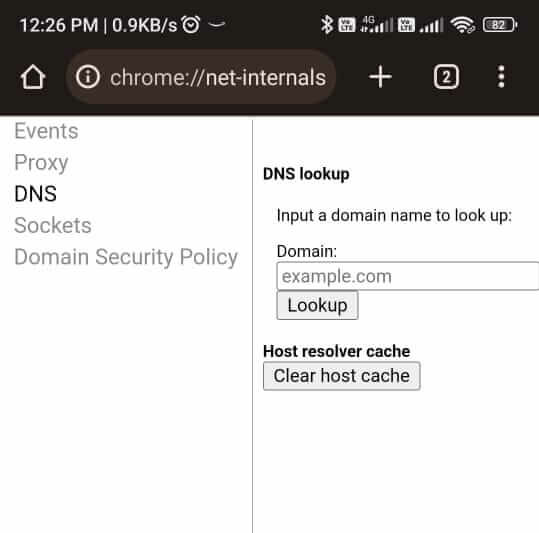
The chrome://net-internals/#dns is also used for clearing the DNS cache on Android mobile phones, iPhones or iPads. Here follow the steps to enter chrome://net-internals/#dns mobile.
- Launch the Chrome browser on your mobile phone.
- Type “chrome://net-internals/#dns” in the address bar and hit Enter
- You can see an internal page open with various DNS-related information on mobile phones.
How to Fix chrome://net-internals/#dns Not Working?
Solution 1: Flush DNS Using Command Prompt
If chrome://net-internals/#dns does not help you to clear the DNS cache in Chrome browser on Windows 11 or 10, you can try to open the Command Prompt and try flushing it as instructed below.
- Go to the search menu and type Click on Run as administrator to launch it with admin rights.
- Now, type the below commands one by one in the command window and execute them.
ipconfig /release
ipconfig /flushdns
ipconfig /renew
- Relaunch Chrome and check everything is working fine.
Solution 2: Restart the DNS Service
Restarting the DNS service flushes your DNS cache and reinitiates the DNS resolver thereby resolving problems with the chrome://net-internals/#dns not working on Windows OS. Follow these instructions to proceed.
- Go to the Run command box (Windows + R keys) and type
- Now, type services.msc and hit Enter to launch the Services window.
- Next, scroll down the screen and search DNS Client.
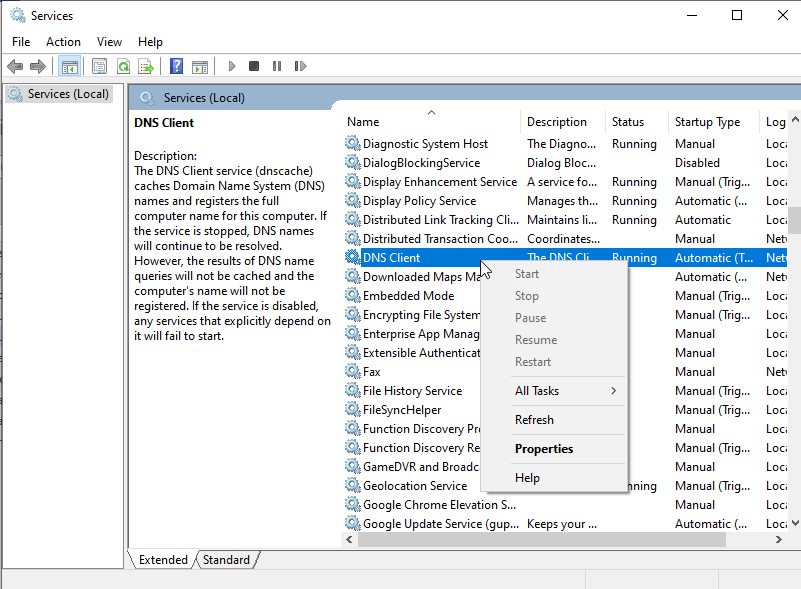
- Right-click on this service and click on Restart.
- If you find this Restart option is greyed out, open Command Prompt with admin rights and execute the following commands one after the other.
net stop dnscache
net start dnscache
- Relaunch Chrome and check if you do not face any issues with Chrome now.
Also Read: 10 Tested Fixes for “Chrome-error://chromewebdata/”
Solution 3: Clear Chrome’s Browsing Data
Clearing Chrome’s browsing data and cookies helps to fix chrome //net-internals/#dns mobile problem since it helps to remove any cached DNS data, cookies, and other temporary files that are contributing to the problem. This also allows your browser to start fresh and resolves DNS issues effectively.
Follow these instructions to delete Chrome’s browsing data.
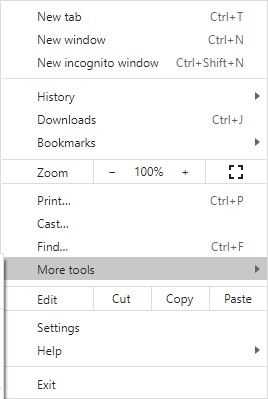
- Go to your Chrome browser and click on the three-dotted icon at the top right corner of the window.
Note: To go to the Cache & Cookies page directly, type chrome://settings/clearBrowserData in the address bar.
- Then, click on the More Tools option from the drop-down menu.
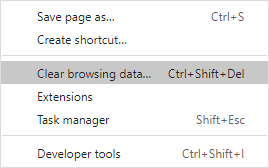
- Now, click on the Clear browsing data option from the drop-down menu.
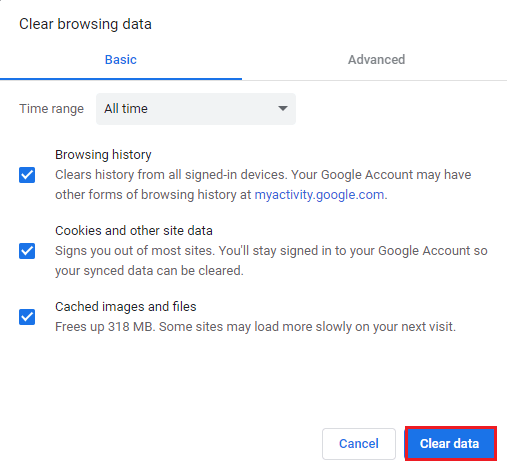
- Next, select the Time range (for example All time), and now, click on the Clear data option. You also choose the Cookies and other site data box and the Cached images and files box before you proceed with it.
Solution 4: Reset Chrome Flags
Resetting Chrome flags will restore the default settings of your browser, thereby eliminating any incorrect configurations that cause issues with chrome //net-internals/#dns mobile. This resolves the issue and restores all the functionality of the DNS section in Chrome internals.
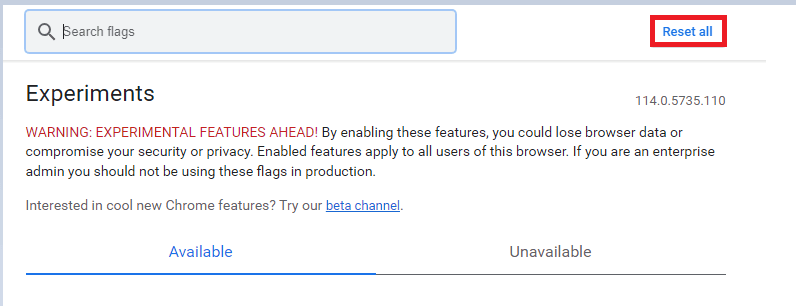
- Launch Chrome on your device and open chrome://flags in the address bar.
- Now, press the Reset All button to reset Chrome flags.
Restart Chrome on your device, now navigate to chrome://net-internals/#dns to remove the DNS cache and chrome://net-internals/#sockets to flush socket pools, and ensure they work normally.
Solution 5: Disable Chrome Extensions
Certain Chrome extensions may interfere with the DNS settings of your browser, and network requests thereby causing conflicts and stopping the chrome //net-internals/#dns clear host cache command from running. Try removing extensions one by one to find the conflicting one and remove it from your browser.
Follow these instructions to disable Chrome extensions from your browser.
- Open Google Chrome on your device.
- Press the three vertical dots at the top-right corner of the screen.
- Now, press the More Tools option followed by Extensions.

Note: To go to the extensions page in a single click, type chrome://extensions/ in the address bar.
- Next, click on the Extensions option from the list.
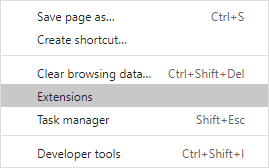
- Turn off the extensions one by one and check if you can use Chrome without any issues.
- If you do not face the error code after disabling any particular extension, then click on the Remove button to delete it from the Chrome browser.
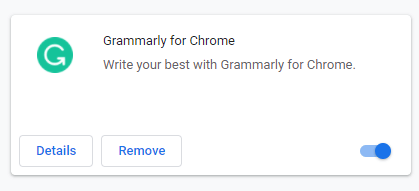
- Restart Chrome on your device and check if you can clear the DNS cache without any issues.
Solution 6: Disable VPN
If you want to connect to any server that is located in some other country, you would face the chrome //net-internals/#dns clear host cache not working issues. Try disabling the VPN service from your device and check if you can fix the issue.
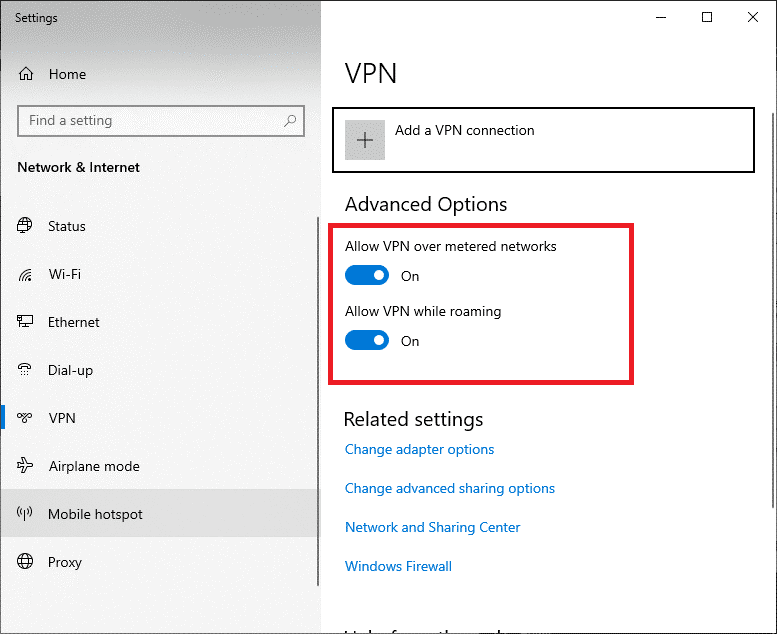
- Hit the Windows key and type VPN settings in the search bar. Now, click Open to launch it.
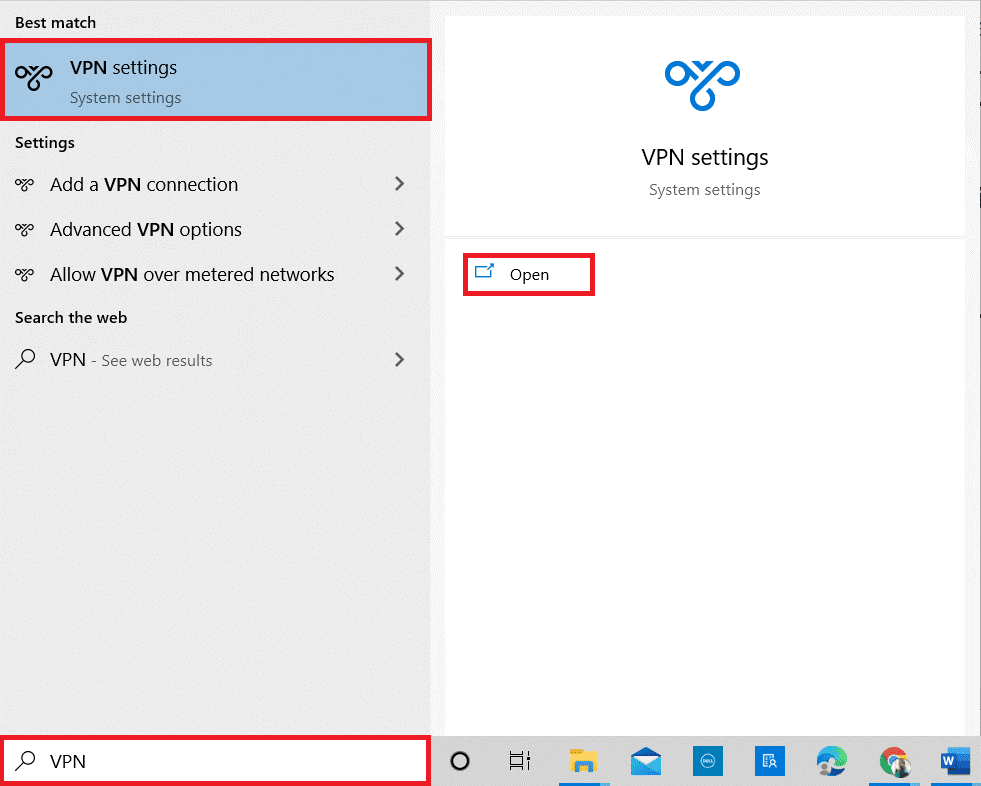
- Navigate to the left pane in the Settings window, click on the VPN
- Disable the below-listed VPN options under Advanced Options:
Allow VPN over metered networks
Allow VPN while roaming
Solution 7: Reinstall Chrome
When you reinstall Chrome, all the corrupt or missing files related to DNS settings will be replaced. It also replaces the existing installation file with a fresh one that potentially fixes the issue.
- Go to the Start menu and search for Control Panel in the search bar.
- Then, press the Uninstall a program option from the list.
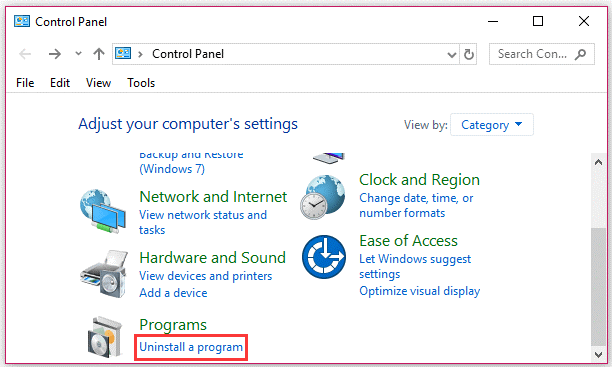
- Now, find Google Chrome in the given list of apps.
- Right-click on Chrome and press the Uninstall

- Now open any browser on your PC and search for Google Chrome in the search bar.
- Click on the first link and click on the download option.
- Now launch the downloaded file and install Chrome.
- Restart your PC and check if the chrome://net-internals/#dns error is resolved now.
Why Flush or Clear DNS Cache?
Well, there are many different benefits of clearing or flushing the DNS cache in the browser. Some of them are:
- Fast Browsing
- Prevent phishing & other attacks
- Recover the internet connections
- Keep data safe
- Improved web browsing (updated version of websites)
Recommended Solution to Fix Various PC Errors
Here it is suggested to run the PC Repair Tool. This tool is user-friendly and will remove all the stubborn and irritating errors from your Windows PC in just a few clicks.
All you need to do is download this tool and run it on your PC, it will scan the entire operating system, detect the errors, and fix them automatically with ease. All types of internal issues like DLL errors, system bug issues, registry errors, and more are easily solved with this tool.
It also repairs damaged, corrupted Windows system files helps you to deal with slow PC performance and will make your PC error-free and fast.
Get PC Repair Tool to Fix PC Errors & Optimize its Performance
Conclusion:
So that is all for how to clear chrome cache using chrome://net-internals/#dns command.
The solutions mentioned above are easy to follow and one of them should work for you, so make sure to follow them one by one till you find the one that works for you.
Hope one of our solutions managed to fix the problem in your case.
If in case you find any doubts or queries related to this particular article, you can get back to us on the Facebook page.
Good Luck..!
Hardeep has always been a Windows lover ever since she got her hands on her first Windows XP PC. She has always been enthusiastic about technological stuff, especially Artificial Intelligence (AI) computing. Before joining PC Error Fix, she worked as a freelancer and worked on numerous technical projects.
