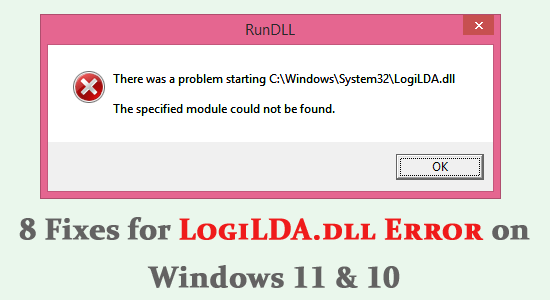
You may face the logiLDA.dll error message if Logitech devices are connected to the PC. The error is commonly seen when you start up your Windows 11 PC.
The error message states, “There was a problem starting C:WindowsSystem32LogiLDA.dll. The specified module could not be found.”
Free DLL Repair Tool
Fix LogiLDA.dll error by repairing corrupted or missing system files, & install the latest DLL file by replacing the damaged/corrupted DLL file.
If you are struggling with the same error message on your computer, this guide will help you fix the same.
What Causes LogiLDA.dll Error?
- Programs such as Logitech Download Assistant will be associated with a file named, LogiLDA.dll. This file will be placed on your computer if any new piece of software is installed on your device. If there is any problem with your LogiLDA.dll file, the error message pops up on the screen.
- This error means that the file is not installed on your computer or is missing from your PC.
- Any recent Windows update or outdated Windows Operating System will cause the error.
- Also, outdated drivers will cause problems like the one you are discussing now.
- Any corrupt files on your computer and incompatible Windows registry keys trigger the issue.
- Any incompatible startup tasks and programs will also trigger the error.
How to Fix LogiLDA.dll Error in Windows 11?
Solution 1: Reconnect Logitech Device
This is a quick fix to get rid of LogiLDA.dll not found the issue. Firstly, disconnect your Logitech device and reconnect it again after some time.
- Many Plug and Play (PnP) Logitech peripherals usually start when you just plug in the device’s cable or wireless receiver.
- Once you have reconnected your device, reboot your computer and check if the error is vanished now. If not, follow the below-mentioned methods.
Solution 2: Disable LogiDA on Startup
If multiple background tasks are running on a PC, they will consume a lot more graphical resources of your computer. This will cause logilda.dll missing an error. We recommend you exit all the unnecessary tasks as demonstrated below.
- Click the Ctrl+ shift+ ESC keys simultaneously to open Task Manager.
- In the Processes tab, right-click the unnecessary task related to Logitech Download Assistant(and other programs) and select the End task option as shown.
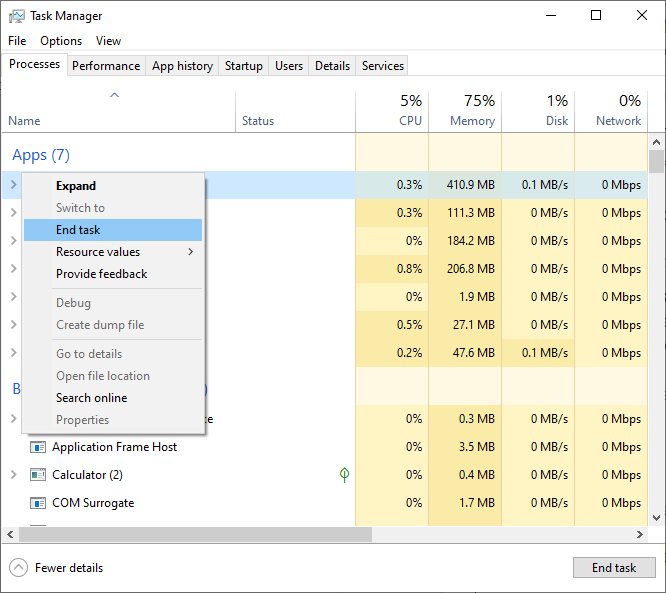
- Repeat the same steps for all background tasks and restart the PC.
Solution 3: Perform an SFC Scan
As discussed earlier, many errors and bugs arise if your PC has corrupt files and folders. Yet, they can be easily fixed using Windows built-in tools like System File Checker. Follow the below-listed instructions to perform an SFC scan on your computer.
- Press the Start key and type cmd on the search bar.
- Then, press the Run as administrator option from the list to open it with admin rights.
- Now, enter the following command and press Enter on the keyboard.
sfc /scannow

- Now, the scanning process begins. If your PC has any corrupt components, all of them will be scanned and will be repaired on their own.
- Once the scanning process is completed, any of the following messages will pop up on the screen.
- Wait until you receive Verification 100 % completed message and once you get this message, check if the error is fixed now.
Solution 4: Install the Latest Windows Update
An updated Operating System is a mandatory requirement for all the apps and programs on your PC. If your Windows computer is not up-to-date, follow the below-listed steps to update it.
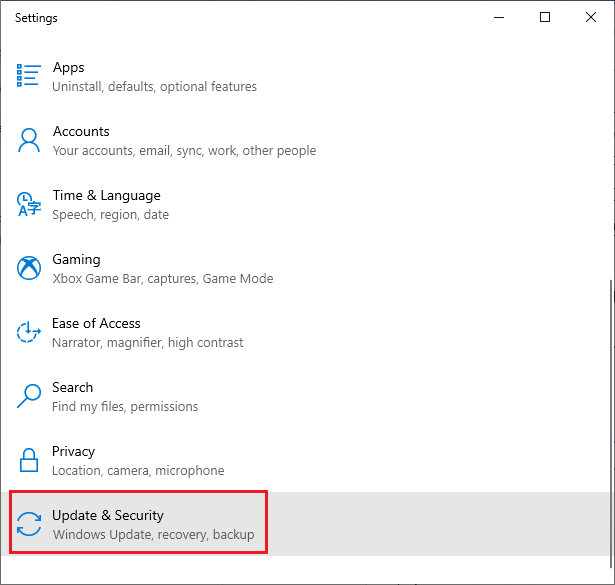
- Hit the Windows + I keys. This will open Settings.
- Choose the Update & Security option.
- Tap on Check for Updates as shown.
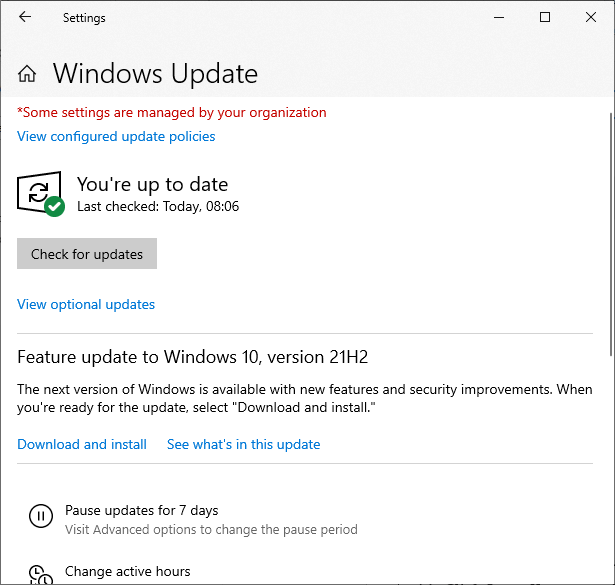
- Press Install now to update to the new version. If the PC is already updated, you will get You’re up to date.
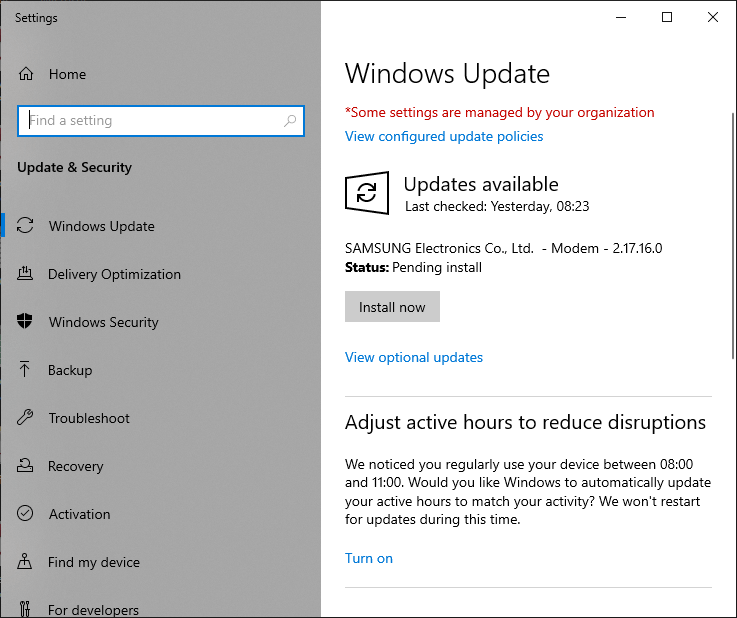
- After updating the device, restart your PC and ensure that the discussed error message is resolved.
Solution 5: Update Your Mouse Device Drivers
Another significant reason that causes the error is that the essential drivers are not updated to their latest version. Follow the listed instructions to update mouse drivers if you are using Logitech-based peripheral devices.
- Press the Windows key and type Device Manager. Open the results by clicking on Open.

- Double-click on Mice and other pointing device adapters. This will expand the driver.
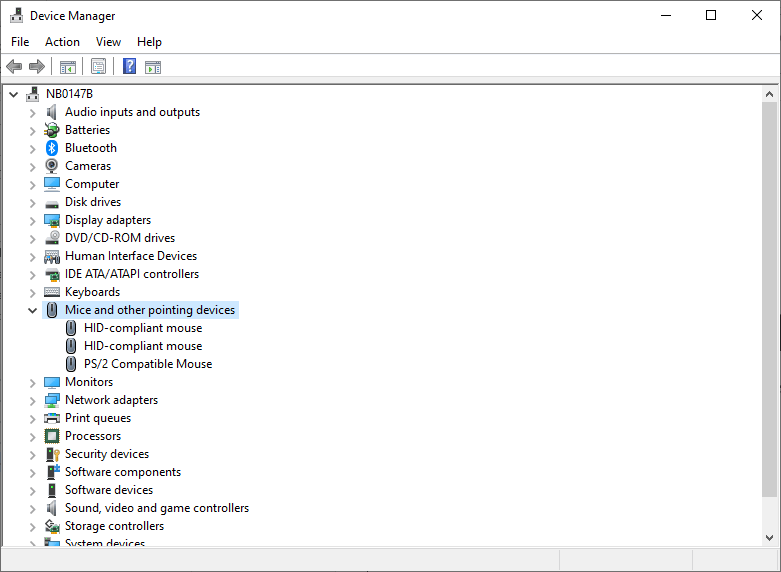
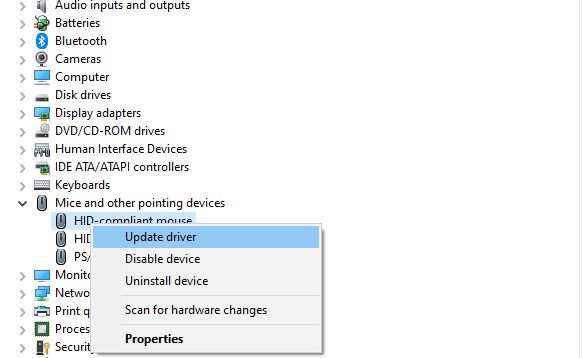
- Right-click on the driver (for example, HID-compliant mouse) and choose Update driver.
- Now click on Search for updated driver automatically.
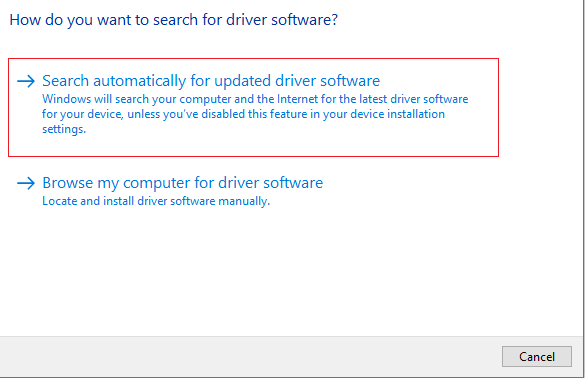
- If drivers are already updated, you will receive The best drivers for your device are already installed promptly on the screen. Else, follow the on-screen prompts to complete the installation.
- Exit the window and reboot your PC once you have installed the latest drivers.
Moreover you can also update the driver using the Driver Updater tool. This is update the entire system drivers just by scanning once.
Get Driver Updater to update driver automatically
Solution 5: Edit the Windows Registry
With a few necessary modifications in the Registry, you can fix the discussed problem on Windows 11 or 10 PC. The key here is to keep a backup of your registry since any modification might just delete vital information about the OS installed. With that said, here is how you modify the registry,
- Press the start key and enter Registry editor. Open the window.
- Now, move to the following location.
HKEY_LOCAL_MACHINE\Software\Microsoft\Windows\CurrentVersion\Run
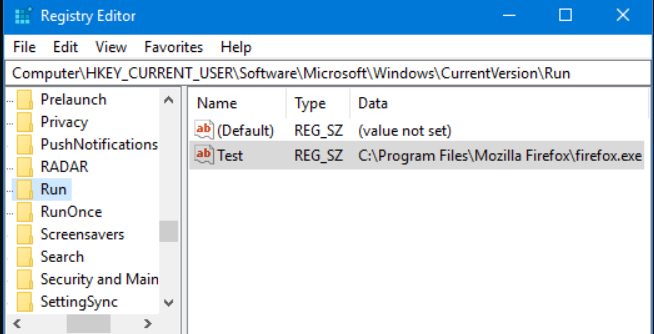
- Then, right-click on the Logitech Download Assistant folder and click on Delete.
Follow the same steps for all LDA keys in the following paths.
HKEY_LOCAL_MACHINE\SOFTWARE\Microsoft\Windows\CurrentVersion\Run
HKEY_LOCAL_MACHINE\SOFTWARE\Logishrd\LogiLDA.DLL
HKEY_LOCAL_MACHINE\SOFTWARE\Logishrd\DownloadAssistant
HKEY_LOCAL_MACHINE\SOFTWARE\Microsoft\Windows\CurrentVersion\App Paths\LogiLDA.dll
- Once you have deleted these keys, restart your computer and check if this solution worked for you or not.
Solution 6: Reinstall the Logitech Program
If the above-listed solutions do not help you fix the error, you can try reinstalling the Logitech support software for your device. This will help you fix the “There was a problem starting logilda.dll” error. In this case, all the misconfigured/corrupt installation files that are bothering the regular app features will be removed from your PC.
- Firstly, press the Start key on Windows 10 and type Apps and Features.
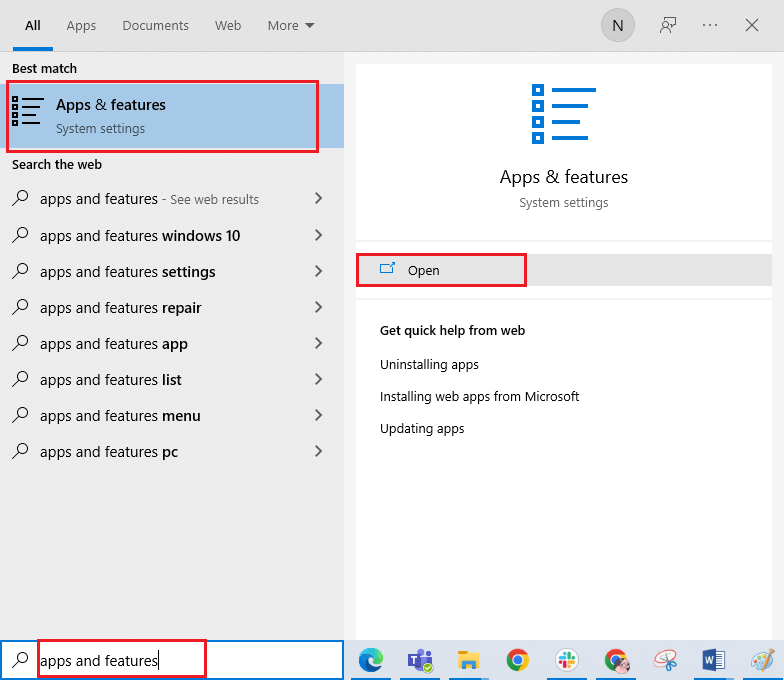
- Now, click on Open.
- Then, search for the Logitech program in the list and click on it.
- Now, press the Uninstall option and confirm the prompt, if any.
- Then, open File Explorer and go to the following locations; delete all the files and folders related to your Logitech program, like Logitech Download Assistant.
C:\Windows\Temp
C:\Program Files\ Logitech program
C:\Program Files (x86)\ Logitech program
C:\Program Files\Common Files\ Logitech program
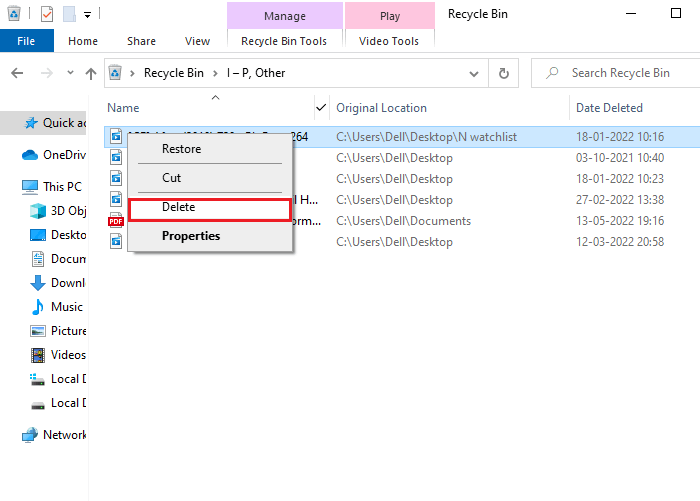
- Make sure you remove these files from Recycle bin.
- Now, open your browser and navigate the official Logitech software download page.
- Then, double-click the executable Logitech software file at the bottom of your screen.
- Wait until the app is installed on your PC and go to My downloads in File Explorer.
- Run the setup file and follow the on-screen prompts to launch the app. Check if the error is fixed or not.
Solution 7: Try Logitech Gaming Software Instead
If reinstalling the app does not help you fix the issue, you can try Logitech Gaming Software which helps you keep your hardware up-to-date. You can also customize your device functions according to your need.
- Uninstall Logitech Download Assistant software by using the above method.
- Then, click on this link to download the software from the Logitech download site.

- Once the file is downloaded, go to My downloads and then double-click on 02.65_x64_Logitech ( the version may vary according to your file) to run it.
- Keep pressing the Next button until you see the installation screen.
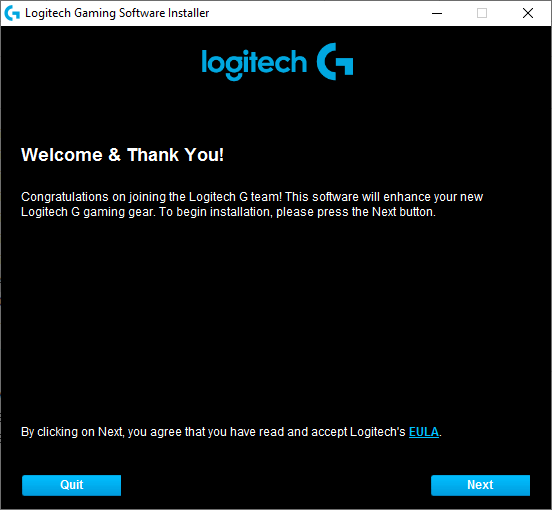
- Once the software is installed, check if you have fixed the error is resolved now.
Solution 8: Perform a System Restore
Restoring previous default settings reinstates the previous working point and eliminates the discussed error in Windows. To perform the task, here are the notable steps,
Note: Before your system restores your PC, you have to boot your computer to safe mode. Sometimes, you cannot perform a system restore functions generally due to faulty errors and drivers. Hence, we advise you to boot your PC to safe mode and restore it as instructed below.
- Open the Run dialog box by pressing the Windows and R keys
- Now, type msconfig in the window and press the Enter
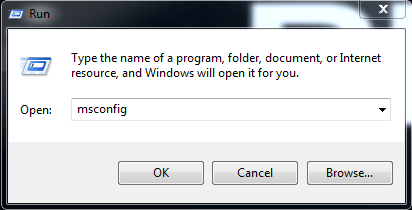
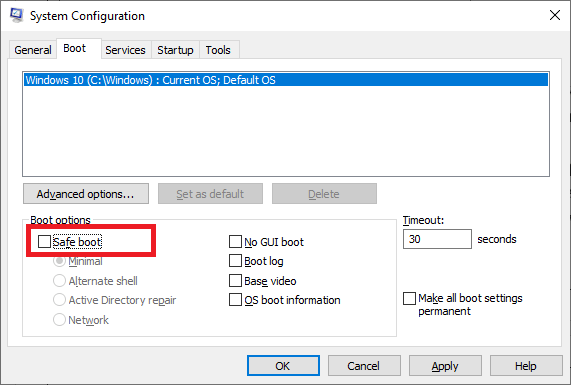
- In the next window, go to the Boot
- Then, select the Safe boot box under the Boot options menu and click OK.
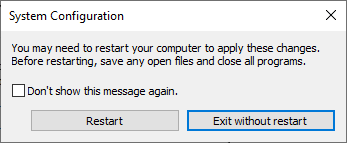
- Confirm the prompt, “You may need to restart your computer to apply these changes. Before restarting, save any open files and close all programs,” by pressing either Restart or Exit without restart.
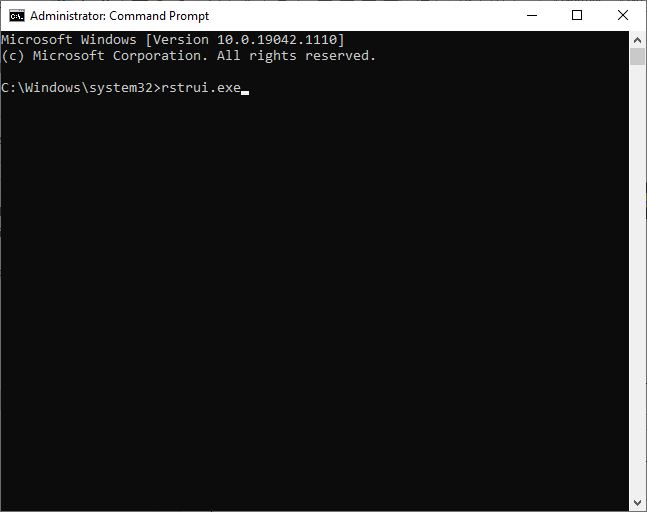
- Then, open the command prompt with admin rights.
- Now, type the following command and press the Enter
rstrui.exe
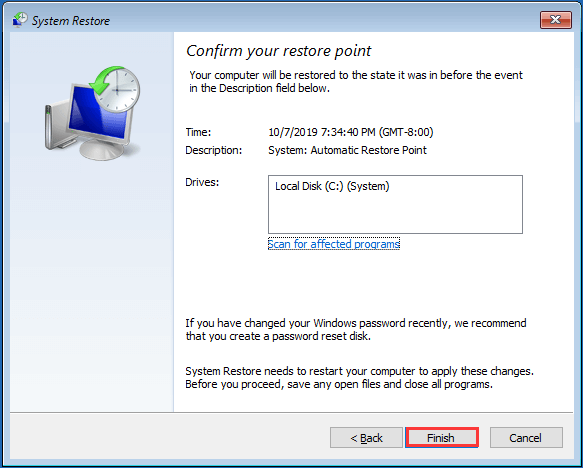
- Now the System Restore window will open. Press the Next button.
- Finally, choose any restore point and then press the Finish
FAQ Related to LogiLDA.dll
1: What is LogiLDA.dll File?
Programs such as Logitech Download Assistant will be associated with a file named, LogiLDA.dll. This file will be placed on your computer if any new piece of software is installed on your device.
2: What is LogiLDA.dll used for?
LogiLDA.dll is a file that belongs to Download Assistant that helps you manage the Logitech programs on your device.
Best Way to Fix LogiLDA.dll Not Found Error
If none of the above listed solutions works for you or looking for an easy solution to fix the LogiLDA.dll not found error, then use the automatic DLL Repair Tool on your system. This tool will scan your system and its files deeply detect the error and replace the damaged DLL file automatically.
You don’t need to open anything else or run any command manually, simply go with this tool and it will do the rest. Along with fixing DLL errors, this tool will also help you to overcome all other system issues like slow PC performance, registry errors, outdated driver problems, BSOD errors, and more. So it is suggested to try this tool once in order to make your PC error-free and new.
Get DLL Repair Tool To Fix LogiLDA.dll Missing Error
Conclusion:
That’s it!
Here I tried my best to list the potential solutions to fix the logilda.dll error on your PC. Try the solutions given individually to fix the error and start launching meetings.
I hope the articles work for you. But if there is anything that I missed out, then feel free to share it with us on our Facebook page.
Also, don’t forget to follow us on our social media handles to get more exciting guides and helpful tips to keep your computer safe from errors and issues.
Good Luck..!
Hardeep has always been a Windows lover ever since she got her hands on her first Windows XP PC. She has always been enthusiastic about technological stuff, especially Artificial Intelligence (AI) computing. Before joining PC Error Fix, she worked as a freelancer and worked on numerous technical projects.