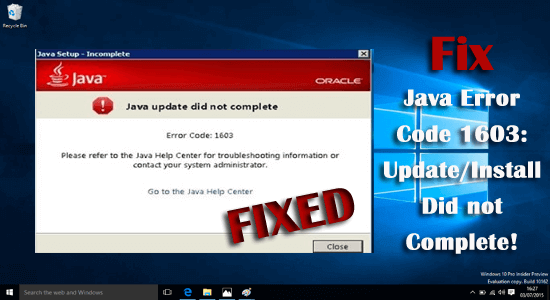
Java is a programming language that doesn’t have so many implementation stumbling blocks. But recently, users are getting the “Java install did not complete Error Code: 1603” message while updating java on their Windows 10 PC. The error message states that the java update is not installed. So, here you can simply fix the problem by installing the correct compatible java version for your system or closing the conflicting antivirus software. However, read this blog entirely to know more fixes in detail.
Well, the error issue is quite common and can easily be solved with proper guidance. So, here we are with this article providing you with bunch of workable solutions to fix the Java update or install Error 1603, but first, learn the common causes that trigger the error on Windows 10.
What Causes Java Error 1603: Update/Install Did Not Complete?
- Java is already installed – If the older Java version is already installed then this might be conflicting and causing the error in your case. Removing the older version of Java might work for you.
- Running online Java Executable – Running an online Java executable can also cause the problem, so check if the install file includes the letter ‘iftw’ (Install From The Web), so it is clear the ask toolbar includes an online version. So make sure to get the offline file and try downloading it.
- Antivirus conflict – Check if your antivirus is conflicting and blocking Java from running then this might be a culprit causing the issue. Disabling the 3rd party antivirus program might work for you.
As you are now aware of the common culprits causing the Java error 1603, here follow the workable solutions as this might work for you to solve the error.
How Do I Fix ‘Java Error Code 1603’ Windows 10?
Solution 1 – Install the Correct & Compatible Java Version For Your System
Check whether you are installing the correct version of Java update for your device or not. We suggest if you run a 64-bit system, you must install 64-bit Java.
You need to follow some simple steps to ensure the version of Windows you use-
- First, click on Cortana to open it.
- Then, type the System in the search.
- Finally, enter the About your PC option to see if your system is 32-bit or 64-bit.
Solution 2 – Install the Java version as an Administrator
You need to install the latest version of Java as an administrator. Follow some simple steps to install Java as an administrator-
- First, right-click on Java install.
- Then, select the Run as administrator option.
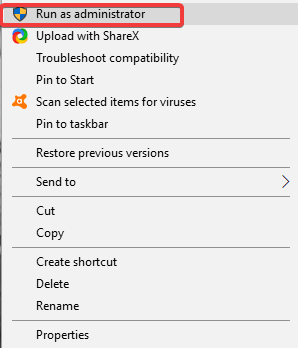
- Finally, start the setup process and follow the instructions that appear on your screen.
We believe now you won’t face the Java 1603 error on your Windows 10. However, if the error still occurs, try our other steps.
Solution 3 – Remove the Older Version of Java
If you uninstall or remove the older version of Java, there is a high chance that the error will disappear automatically.
Try uninstalling Java by following the steps given:
- Press the Windows button and in the search box type the control panel and launch it.
- Now click Programs after that choose All Programs.
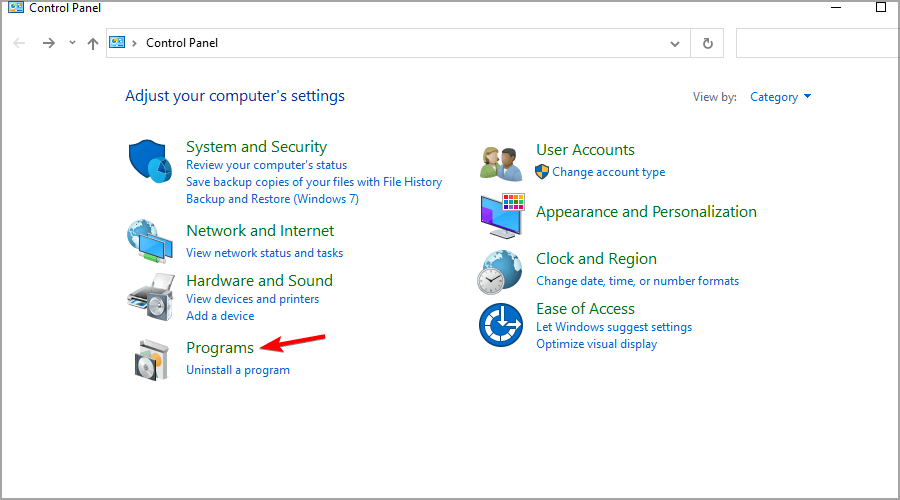
- From here select Java, and click on Uninstall
- Now reboot your Windows system as Java is uninstalled.
Moreover, you can also uninstall Java using a third-party professional uninstaller. This removes the program completely without leaving any traces, junk or registry entries behind that might cause conflict the next time you install the program.
Get Revo Uninstaller to Uninstall Java Completely
Next, install the latest Java version from the official website with the 32 or 64-bit Windows offline installers.
Check if the error 1603 Java update did not complete is fixed, or head to the next potential fix.
Solution 4 – Turn Off Antivirus
Most of the time, Java is blocked by security software. So, maybe the Java error occurs due to the 3rd party antivirus installed on your system.
Hence, we suggest you disable your Antivirus to install Java temporarily.
Here is the process you need to follow
- First, by right-clicking the taskbar, open Task Manager.
- Now, select the Startup tab and click enter on your security software or Antivirus.
- Then, click on disable button to stop Antivirus.
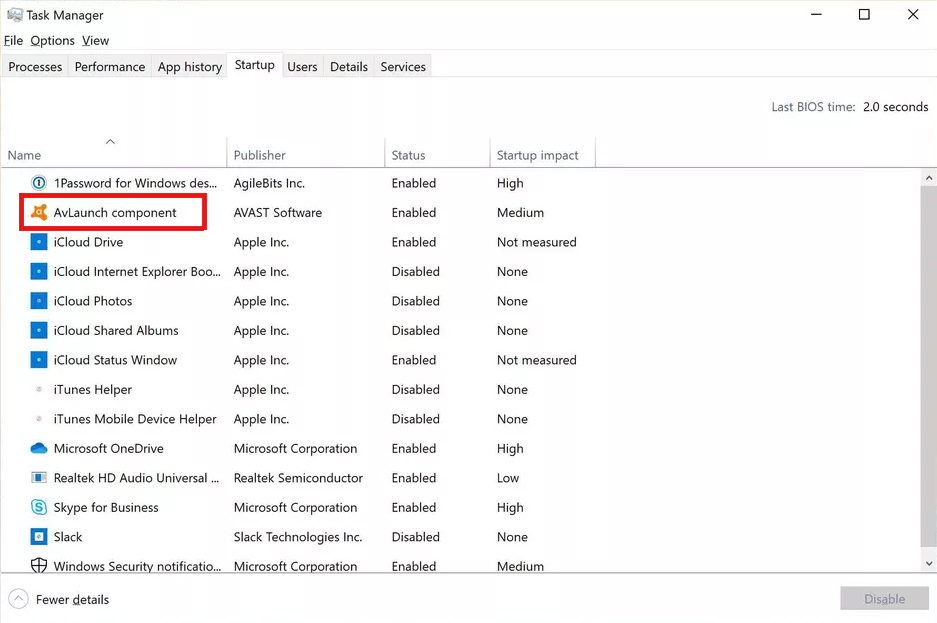
- Finally, start your device again and click on install to Java.
Solution 5 – Close the Program that Runs Java
You must close the browser and any other Java-enabled apps after using the Java installation. This might be conflicting and block Java from running on Windows 10.
Solution 6 – Turn Off Java Content
Many users confirmed disabling the Java content settings worked for them to solve the Java install did not complete Error Code: 1603
Follow the steps to do so:
- First, click on the shortcut key Windows +R
- Now, in the Run box type the control panel.
- And in the windows that appear locate Java and open it.
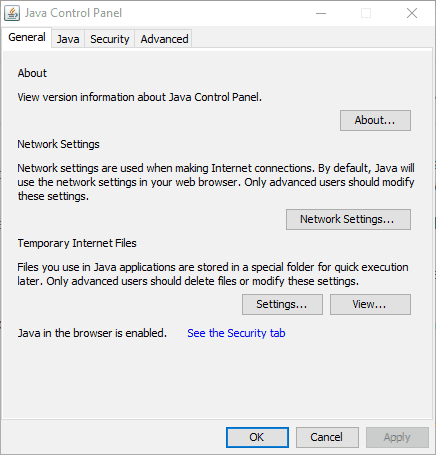
- Now, in the Java Control Panel > click on the Security tab
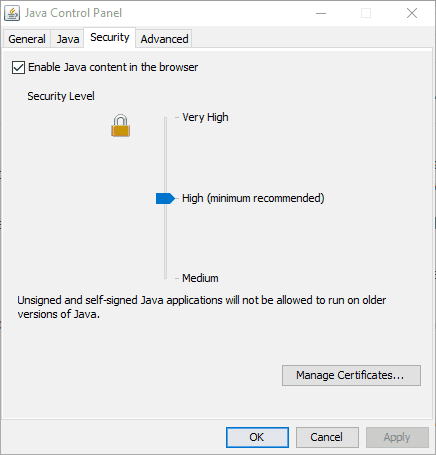
- Then, remove the checkmark next to Enable Java content in the browser option
- To confirm, click the Apply and OK buttons.
- And install Java next checkmark next to Enable Java content in the browser option.
Solution 7 – Run Program Install & Uninstall Troubleshooter
Many users reported they managed to fix the problem by running the Program Install and Uninstall troubleshooter and managed to fix the Java Error code 1603.
Well, the Program Install and Uninstall troubleshooter is not available in Windows you need to download the tool. Follow the steps to do so:
- Visit Microsoft’s website to download the tool by clicking on the Download button
- After downloading, install Program Install and Uninstall troubleshooter
- Once installed launch the Troubleshooter and double click on the MicrosoftProgram Install and Uninstall.meta.diagcab file.
- And in the window click on next and follow the on-screen instructions.
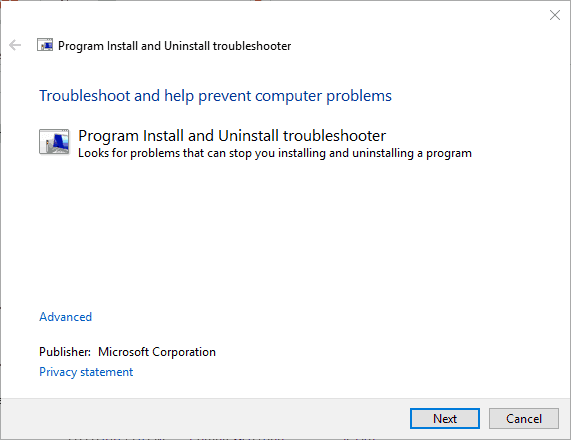
Now check if the Java install error 1603 is fixed.
Solution 8 – Don’t Install Java with LogMeIn
Sometimes the Java update error 1603 occurs for the LogMeIn users while installing Java.
According to the report, most LogMeIn users have noticed Java errors due to LogMeIn remote desktop software.
Check if you are using LogMeIn during installing or updating Java, then avoid using the software and try installing Java on the Windows system without using remote desktop software.
So, we suggest not using LogMeIn while installing Java and fixing the error.
Solution 9 – Delete Windows Update KB2918614
One of the common reasons for the Java error in Windows 10 is Windows Update KB2918614. We suggest you delete Windows Update KB2918614 to fix the Java error.
Here are the steps you need to follow-
- Using the Windows key + R, open the Run dialogue box.
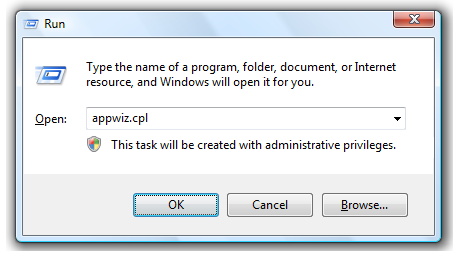
- In the Run box that appears, type appwiz.cpl and click OK.
- When the Programs in Features box displays, click the View installed updates option in the left pane.
- You’ll see a list of updates that have been installed.
- Look for the code KB2918614.
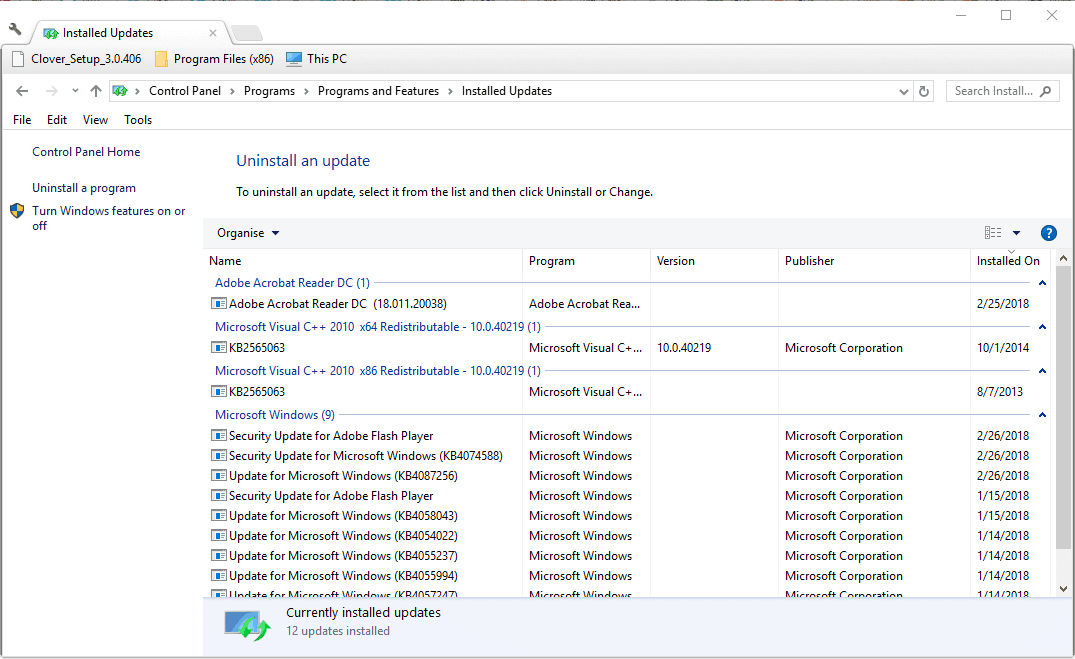
- Click the Uninstall button next to the KB2918614 Windows update.
- Once the uninstallation is complete, restart your computer to see if the Java issue 1603 has been resolved.
Frequently Asked Questions:
How to enable Java in 64-bit Internet Explorer?
Follow the steps to enable Java in 64-bit Internet Explorer:
- Select the Explorer from the file menu.
- Next, click on Preferences.
- Select Java under Web Browser on the left panel.
- Now, on the right side under Java Options, check the option box for Enable Java and tap OK.
How to install 64-bit version Java?
Follow the instructions below to install 64-bit Java version on your system:
- Select the 64-bit Windows offline download.
- Now, select the folder location when the File Download dialog box appears.
- Then, exit all the applications including your browser.
- Click twice on the saved file icon to begin with the installation process.
Is it possible to install both 32bit and 64-bit Java on Windows 10?
Yes, you can install both 64 & 32-bit Java version on your Windows 10 system. As both versions don’t conflict with each other instead they are connected directly to the browser you’re using.
Best & Easy Solution to Fix Windows PC Issues & Errors
Seeing various errors on your Windows PC then here it is suggested to run the advanced and professional PC Repair Tool.
This is an advanced and multifunctional tool that just by scanning once detects and fixes various stubborn computer errors.
With this, you can also fix many computer fatal errors like BSOD errors, DLL errors, Runtime errors, repair registry entries, and much more.
This scans your PC regularly, repairs corrupted Windows system files to optimize its performance
Get PC Repair Tool, to Fix Various Windows 10 Errors
Final Words:
So, these are some of the top solutions to fix error 1603 java update did not complete.
Try the solutions listed in the article one by one to get past the error in Windows 10. It is estimated that one of our solutions listed must work for you to solve the error.
Hope the article turns out to be useful for you.
If you have any queries regarding the error then share them on our Facebook page.
Also don’t forget to like, share, and follow our page.
Good Luck..!
Hardeep has always been a Windows lover ever since she got her hands on her first Windows XP PC. She has always been enthusiastic about technological stuff, especially Artificial Intelligence (AI) computing. Before joining PC Error Fix, she worked as a freelancer and worked on numerous technical projects.