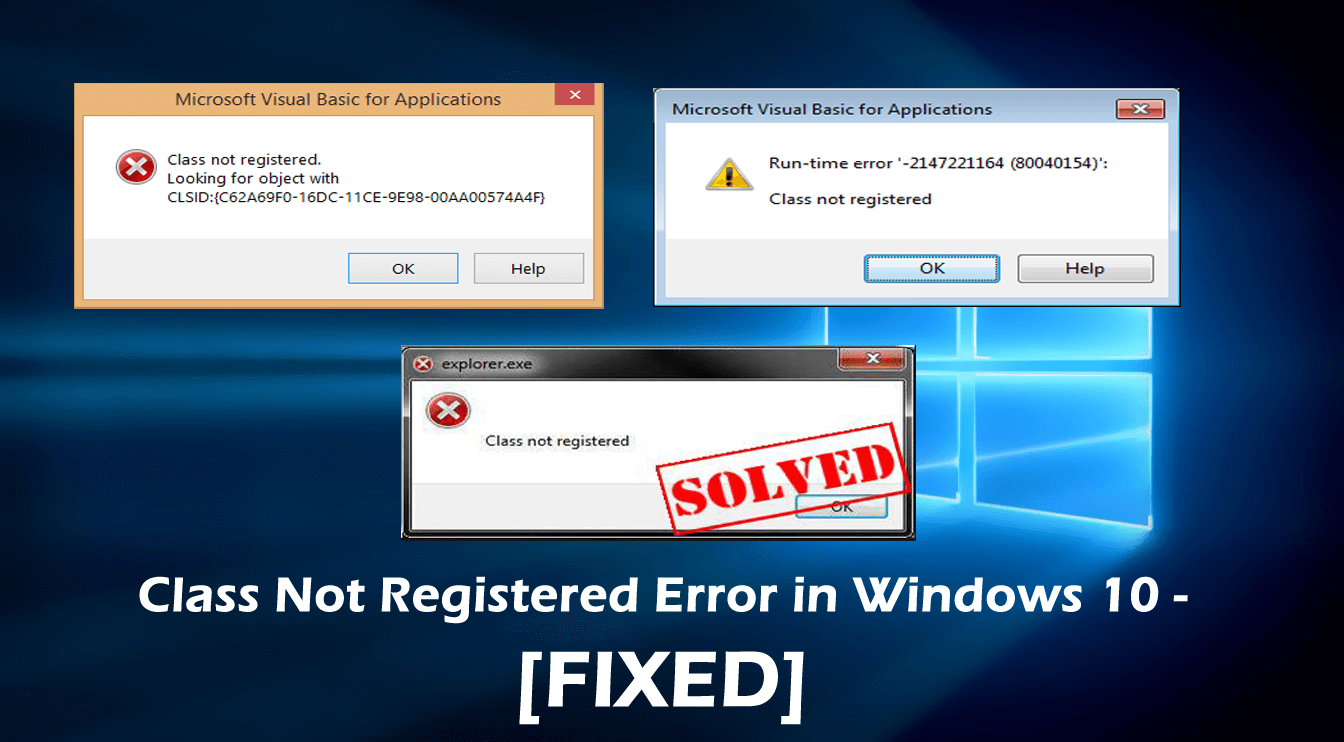
If you are using Windows OS, then you may have encountered various errors and system error codes from time to time.
And speaking of errors, each error can occur in one of the plenty of different locations on the system.
Among them, one such error is “Class not registered” in Windows 10. This is quite troublesome error and can affect almost any software in Windows 10.
Well, one of the most common reasons for the error class not registered is the DLL file becomes unregistered on Windows 10.
The DLL files contain information and instruction which is essential for the program to run correctly. But if the DLL file is removed, updated or overwritten with another version on the computer, then the program relies on that particular DLL files fail to work or won’t work properly.
And as a result, you start getting error Class not registered when you attempt to run that particular program on Windows 10.
So, in this article check out the complete steps on how to fix class not registered error.
How Do I Fix Class not Registered Error on Windows 10
Fix 1 – Disable or turn off iCloud on Windows 10
Some users informed the error appears due to iCloud, so here o fix the error you need to disable the iCloud from task manager
Steps to turn off iCloud in Windows 10:
- First Open task manager by pressing Ctrl + Shift + Esc.
- Find iCloud, and right-click it and select End Task.

Along with this, you can also disable iCloud from booting up by using Task Manager.
- Open the task manager > go to the Startup tab.
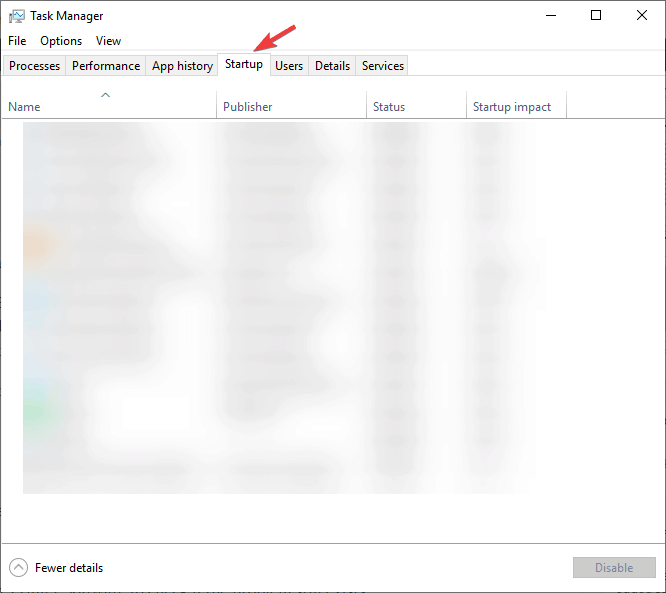
- Find iCould, right-click it and select Disable.

Fix 2 – Re-register ExplorerFrame.dll file
If you find the Internet Explorer is crashing with the error Class not registered then you should try the given steps to fix it:
- Press Windows + X > open the Command Prompt with administrator privilege.

- As the Command Prompt Window, paste the below-given command and hit Enter to run it:
regsvr32 ExplorerFrame.dll

It is estimated now the class not registered error in the internet explorer in Windows 10 is fixed.
Fix 3 – Utilize Component Services
To execute Component Services apply the below-given steps:
- Press Windows Key + R > type dcomcnfg > click OK

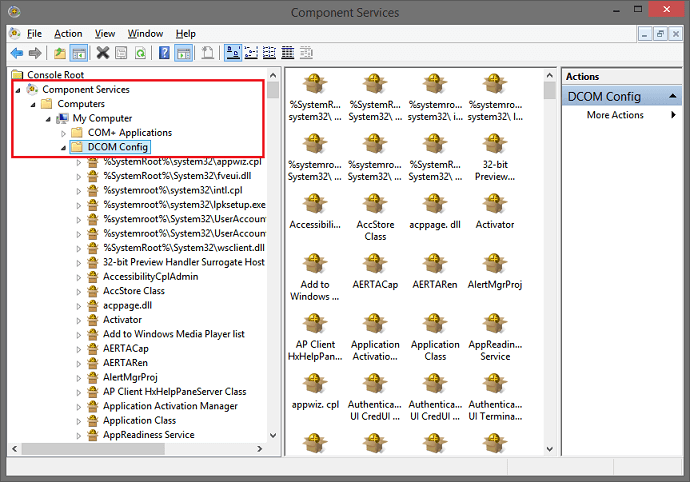
- You will see “Component Services window”, go to the Component Services > Computers > My Computer > double click DCOM Config.
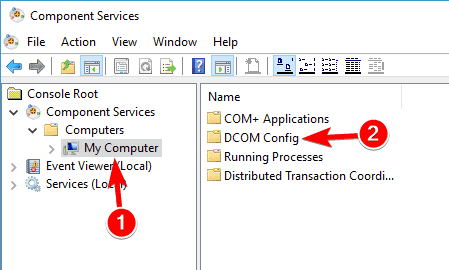
- Some warning messages will appear just click Yes.
- After it, close the Component Services and reboot your computer.
And now the error class not registered in Windows 10 is fixed.
Fix 4- Create New Microsoft Account
If you are still receiving the class not registered then here you need to create a new Microsoft account on Windows 10.
- Open the Settings app, to do this press the Windows key + I and move to the Account section

- From the left side of the menu select Family and other people option and then click on the Add someone else on this PC.

- Sign in by using your Microsoft account e-mail id and then click on Next.
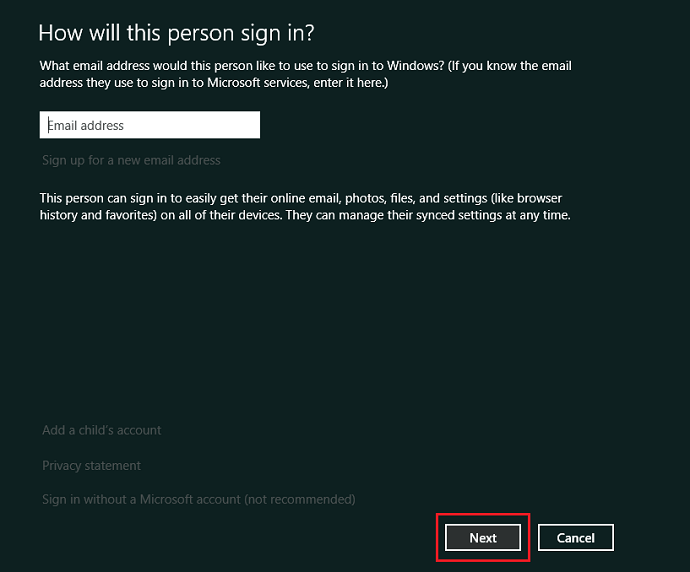
- And log out from your current account and sign in with the new one.
Now the error Class not Registered in Windows 10 is fixed.
How to Fix Class Not Registered Error in Edge?
Many users confirmed they are getting error class not registered when opening Edge. So if you are getting the error in Edge then follow the fixes given
Fix 1 – Set Edge/Internet Explorer as Default Internet browser
You may also get Class not registered error when searching the web using Cortana, to get rid of this you must have to set Edge as a default web browser.
Apply the below-given steps to do so:
- Open search box by pressing Windows Key + S, type Control Panel from the list of results select Control Panel.

- Now choose Default Programs window > choose set your default programs.

- Move to Web Browser section > click on the browser
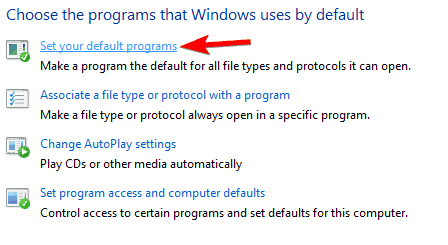
- And from the list > choose Microsoft Edge and click it. After it, click Set this program as default.
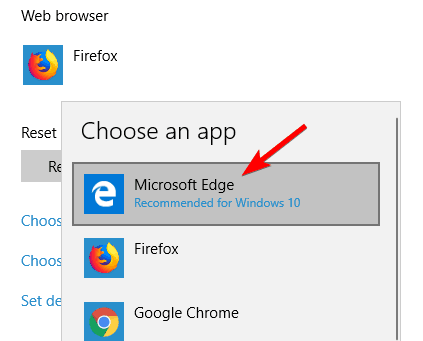
- Click OK to save the changes.
It is estimated now Class not Registered error in Edge is fixed.
Fix 2 – Make Sure Internet Explorer ETW Collector Service is Running
The class not registered error commonly affects Internet Explorer and Microsoft Edge.
If you’re having this issue with these web browsers then try the following:
- Open the search box by pressing Windows Key + S and type services.msc > click OK
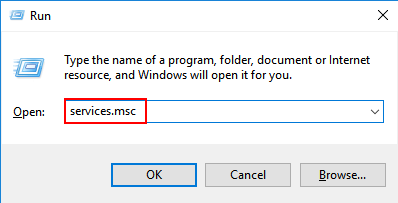
- From the list of services find Internet Explorer ETW Collector Service > right click it > Start.

All the above-given solutions are very effective, it is recommended to apply them carefully and the Class not Registered error in Microsoft Edge is fixed.
How to Fix Class not Registered Error with .jpg files on Windows 10?
Some users confirmed they are getting the error Class not registered while opening pictures, or videos. So if you are also receiving the error then follow the fixes given below.
Fix 1: Modify the default Photo viewer to Windows Photo Viewer
As said if you are getting Class not registered Windows 10 error while trying to view .jpg files, then here try setting your default image viewer to Windows Photo Viewer. Here follow the steps to do so
- Very first you need to download and run the file It is a .reg file that will automatically change your Windows registry and turn on the Windows Photo Viewer on your system.
- Now, right-click on any image present on your system.
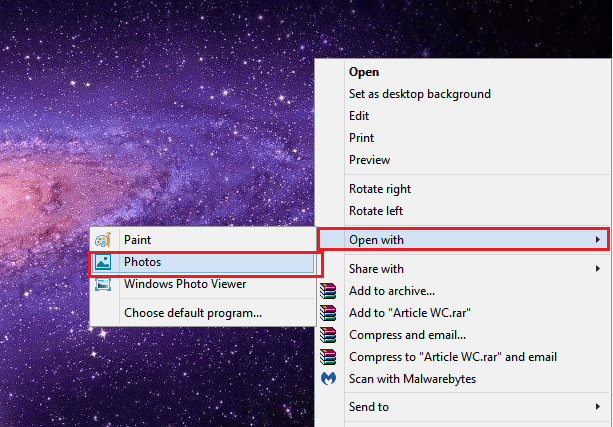
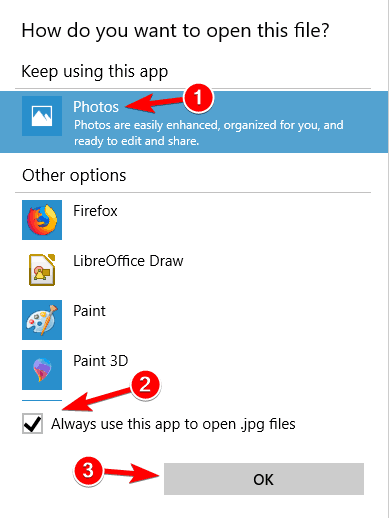
- From the menu select the Open with > Choose another app.
- Choose the Windows Photo Viewer from the list. Choose Always use this app to open .jpg files and then click OK to save changes.
However, if you don’t want to make any changes to your system registry then download and free image viewing software and install it on your computer and follow the next steps.
Fix 2: Reset Default Apps
Many users confirmed that the “Class not Registered” error while trying to open .jpg file on the computer is fixed by resetting default apps.
Follow the steps to do so:
- Go to the Settings > Apps > Default apps.
- Scroll down to find out Reset to the Microsoft recommended defaults. Then click on the Reset button.
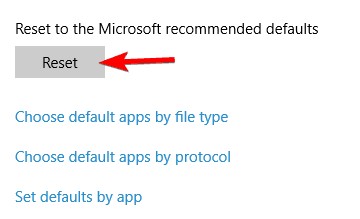 Now check if the Class not registered Windows 10 opening JPG file is fixed or not.
How to Fix Class not Registered Explorer.exe Error In Windows 10?
Just like the above the “Class not registered” error also appears with the explorer.exe and as a result the start menu, Cortana, screen, etc. stopped working.
So if you are also encountering the error explorer.exe class not registered settings then follow the below-given steps:
Fix 1: Restart explorer.exe
In order to restart explorer.exe, follow the given steps:
- Open the Task Manager and navigate to the Details tab.
- Here, you should search explorer.exe and right-click on it then select End Task from the menu.
- From the Task Manager navigate to the File > Run new task.
- Now, in the new task window, > type explorer and hit the Enter key.
Hence, the explorer gets rebooted and everything gets fixed.
So, these are some of the commonly received Class not registered errors.
Make your Windows PC/Laptop Error-Free
To make your computer fast and more secure try running the PC Repair Tool, this is a professional recommended solution that just by scanning once detect and fix various PC errors.
With this, you can also fix other PC problems like repair corrupted system files, fix BSOD errors, DLL errors, repair registry entries and much more.
This also optimizes and speeds up the Windows PC performance.
Get PC Repair Tool, to repair and secure your PC/Laptop
Conclusion
The Class not registered Windows 10 error can cause different problems on the computer. Here in this article, I tried my best to list down different errors related to class not registered.
Make sure to follow the fixes given carefully and get rid of the Class not registered Windows 10 errors.
I hope the fixes given in the article worked for you.
Hardeep has always been a Windows lover ever since she got her hands on her first Windows XP PC. She has always been enthusiastic about technological stuff, especially Artificial Intelligence (AI) computing. Before joining PC Error Fix, she worked as a freelancer and worked on numerous technical projects.