Windows 10 networking issues are very common, initially, users get unable to connect their Windows 10 system to the internet.
This occurs in the Windows system because of the router, DNS server or system drivers and sometimes registry configuration may also generate this issue.
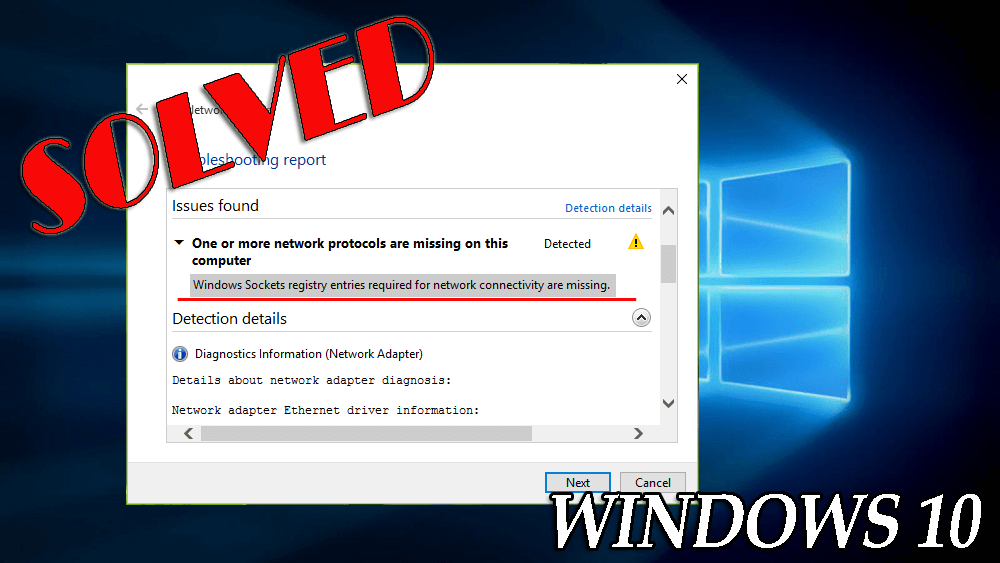
If you are unable to connect to the internet then there is a chance that the network registry entries are damaged or missing. If you execute network troubleshooting with the help of Network Adapter troubleshooter then, you may receive this error:
“One or more network protocols are missing on this computer”
“Windows sockets registry entries required for network connectivity are missing.”
The above-given error clearly indicates that Windows Sockets (Winsock andWinsock2 subways) registry entries are not working correctly.
Windows Sockets is responsible for managing incoming and outgoing network requests in Windows OS. So it is understandable, if the system gets unable to process the network requests then the network won’t work.
Don’t worry and apply the below-given fixes to solve this issue.
How to Fix Socket Error Windows 10?
Here are the solutions that will help you in overcoming one or more network protocols are missing on this computer Windows 10 issue with ease.
Method 1 – Try to reset Winsock via Command Prompt
Resetting Windows Sockets entries using Command Prompt is a very simple task.
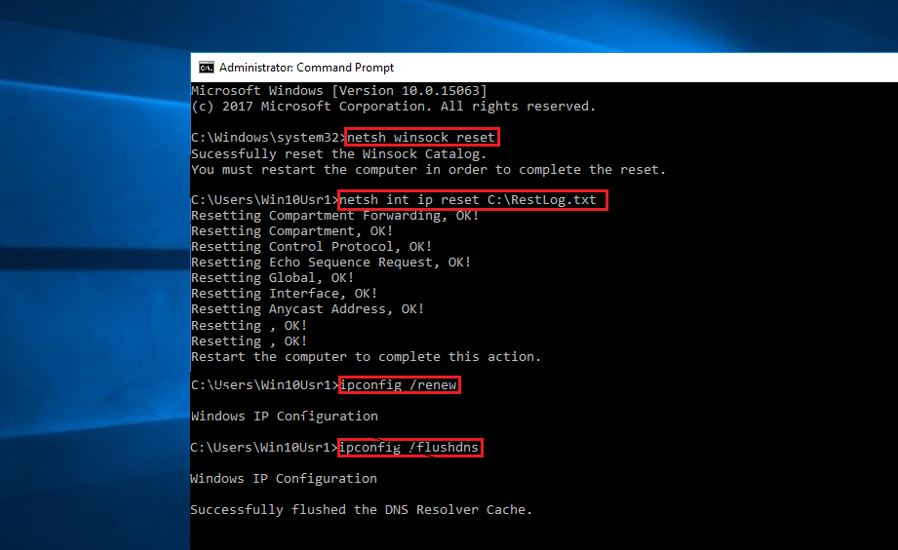
- Open Command Prompt with the administrative privileges and enter the below-given command and press Enter key:
netsh winsock reset

After the successful completion of the command is, you’ll be requested to restart the system in order to finish the reset. After restarting the machine, verify the Winsock registry fix Windows 10 of the issue.
If the problem got fixed then ok otherwise you must have to reset Windows Sockets registry manually, because it may have exaggerated TCP/IP settings as well. To do this, go to method 2.
Method 2 – Remove Winsock Registry and Reinstall TCP/IP
Note: Editing the registry database manually is a risky task, a simple mistake while manipulating the registry could affect the entire Windows system.
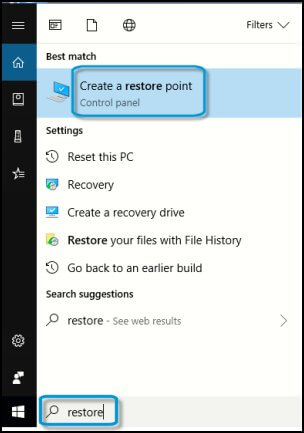
So it is recommended to edit the registry database carefully and create a System Restore point first. Follow the steps to create a restore point:
- Click on the Start button
- Go to the search box and type Restore Point
- Click on the Create Restore point option from the list and wait until Windows creates a restore point.
Now, follow the below steps to remove the Winsock registry:
- Open run dialog box by pressing Windows + R keys and type Regedit in the Run dialog box. Registry Editor will open.

- From the left pane of Registry Editor, go to the below-given registry key:
HKEY_LOCAL_MACHINE\SYSTEM\CurrentControlSet\Services\WinSock2

- Here, right-click on the WinSock2 key and choose Export. Save the registry entry back up to an appropriate location.
- After it, again right-click on the same registry key, and choose Delete.

- From the left pane of Registry Editor, go to the below-given registry key:
WinSock(HKEY_LOCAL_MACHINE\SYSTEM\CurrentControlSet\Services\Winsock)
- After it, close the Registry Editor.
- Click on the start menu and open the Control Panel, navigate to the Network and Internet > Network Connections.
- Right-click on Local Area Connection or Ethernet connection and choose Properties.

- At the Local Area Connection or Ethernet connection property, click on Install.

- After it, choose Protocol present under Select Network Feature Type and click Add.

- Then click on the Have Disk in Select Network Protocol window.

- In the “Install From Disk” window, enter C:\Windows\inf for Copy manufacturer’s files from the section. Click OK.

*Substitute C: with your system root drive.
- At last, at the Select Network Protocol window, choose Internet Protocol (TCP/IP) – Tunnels. Click OK. Close Network and Sharing Center, reboot your machine.

After the completion of the above-given steps, you can recreate registry configuration, which eventually solves the windows sockets registry entries required for network connectivity are missing problem.
Method 3 – Disable the Network Adapters
Try disabling the network adapter, this might help in solving the Windows 10 socket error and then you can easily connect to the network.
Follow the steps to disable the network adapter:
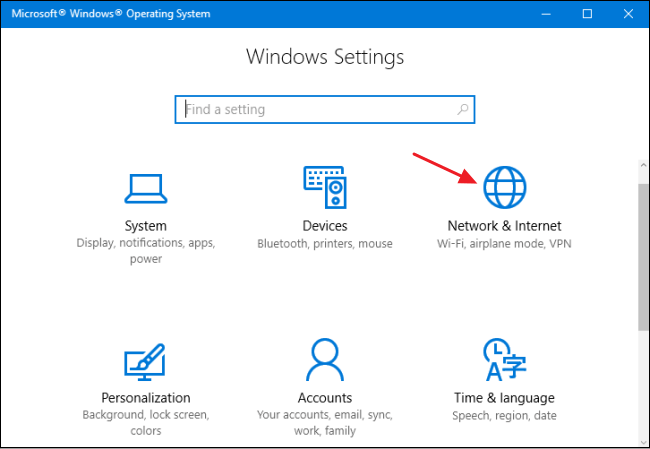
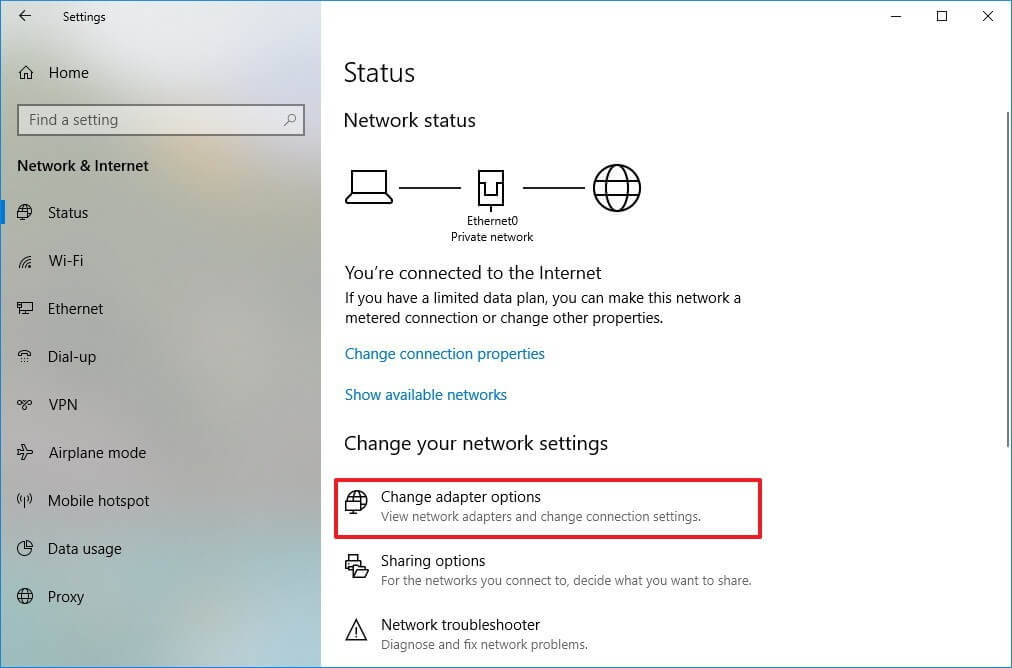
- Go to settings
- Click on Network & Internet
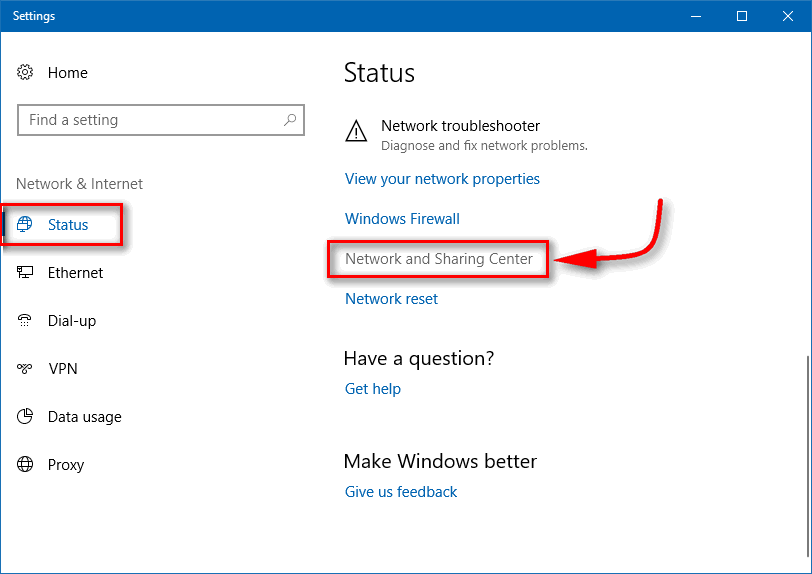
- Click on status
- Open the Network and Sharing Center
- Click on the Change adapter settings option
- Search for the network adapter, right-click on it and click on Disable
- After you disable it, again right-click on it and click on Enable
Performing the above-steps your Windows sockets registry entries required for network connectivity are missing problems will be solved.
Method 4 – Disable the Proxy
To fix the Windows socket error try to disable the proxy. Follow the steps to do so:
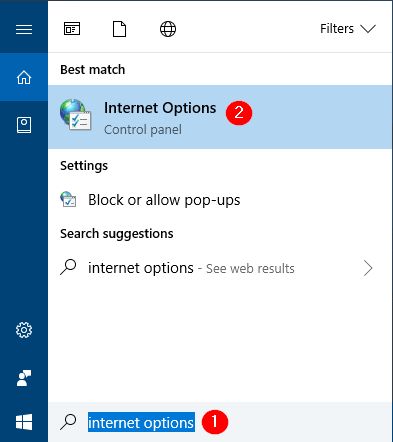
- Press the Windows icon
- Type Internet option and click on the result
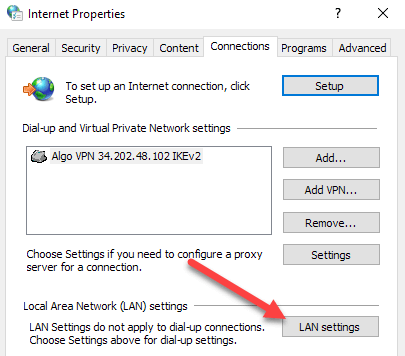
- In the Internet Properties window, click on connection tab and select the LAN settings
- Now, check the proxy server settings and see it is not ticked mark
- Click on OK
You can also check the Proxy by following the below-given steps:
- Go to settings
- Click on Network & Internet
- Click on Proxy
- Check whether the Use a proxy server option is turned off
After disabling the proxy, try to connect your system to the network and see if the windows sockets registry entries required for network connectivity are missing error message disappears or not.
Method 5 – Try netsh int ipv4 install Command
To resolve the Windows socket registry error, you can try the netsh int ipv4 install command. For that follow the steps given below:
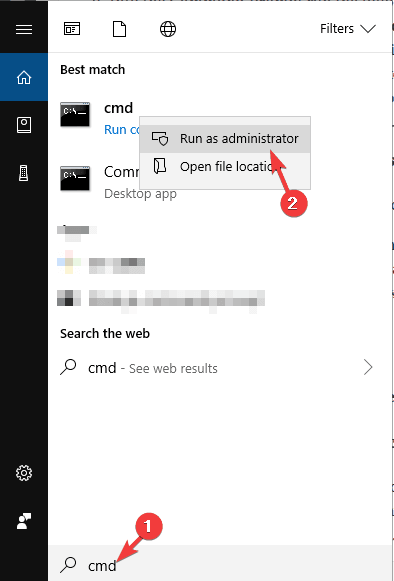
- Press the Windows icon
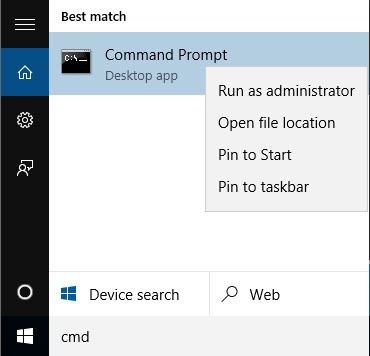
- Type cmd, right-click on the result and select run as administrator
- In the command prompt window, type netsh int ipv4 install and hit the enter key
- Close the command prompt
Restart your Windows and whether you are able to connect to the internet on Windows without the one or more network protocols are missing on this computer windows 10 message.
Method 6 – Run the ipconfig Command
Windows sockets registry entries required for network connectivity are missing problem can be solved by using the ipconfig command.
Follow the steps mentioned below to execute the ipconfig command:
- Press the Windows icon
- Type cmd, right-click on the result and select run as administrator
In the command prompt window, type the following command and press the enter key after each of them:
netcfg -d
ipconfig /release
ipconfig /renew
ipconfig /flushdns
ipconfig /registerdns
Once the commands are completed, restart your Windows and see whether the error message vanishes from your computer screen or not.
Method 7 – Disable the LMHOSTS Lookup
To fix the socket error Windows 10 you can try disabling the LMHOSTS Lookup. In order to disable the LMHOSTS Lookup, follow the steps given below:
- Go to the settings
- Click on Network and Sharing Center
- Choose your connection, click on it and select properties
- In the Internet Protocol Version 4 Properties Window, click on the Advanced button
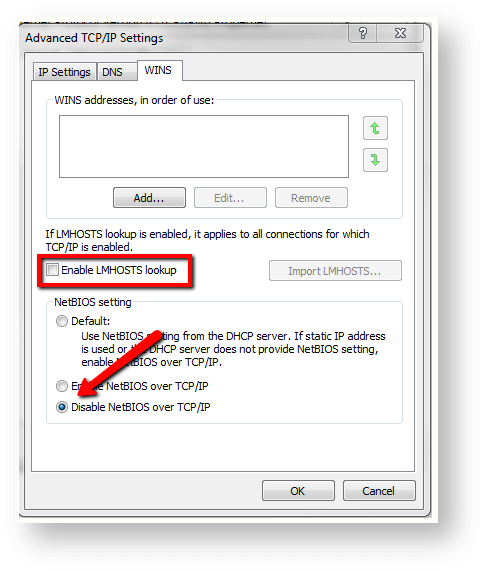
- In the Advanced TCP/IP settings, click on WINS tab
- Uncheck the Enable LMHOSTS lookup option
- Select the Disable NetBIOS over TCP/IP
- Click on Ok
After LMHOSTS lookup is disabled, check Windows sockets registry entries required for network connectivity are missing issue is solved or not.
Method 8 – Update Drivers
Windows sockets registry entries required for network connectivity are missing error message can also appear on the screen due to outdated drivers.
Therefore, it is suggested to update all your outdated drivers to solve this issue. Follow the steps to update your drivers manually:
- Press the Windows icon
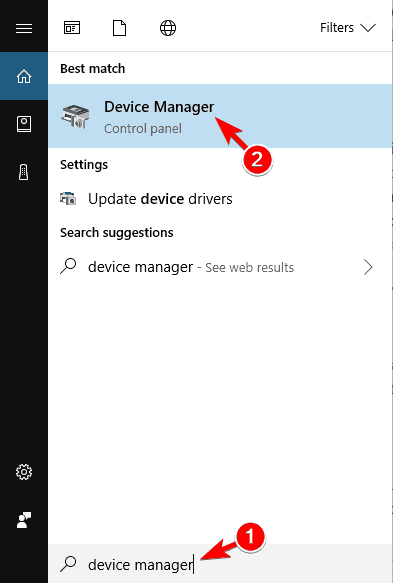
- Type Device Manager and click on the result
- Now, select the device, choose the driver that needs to be updated
- Right-click on it and click on update
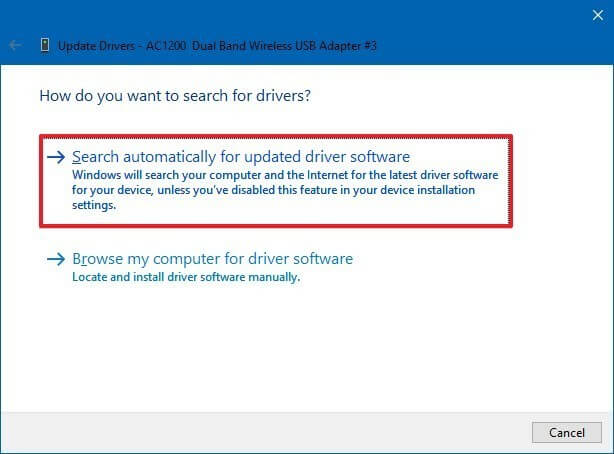
- Click on Search automatically for updated driver software
If there are updates available then it will get done automatically. You can also update drivers with the help of Driver Updater.
This will not only update the drivers but also solves driver related issue with ease.
Get Driver Updater to Update the Drivers Automatically
Make Your Windows PC/Laptop Secure & Error-Free
To keep your Windows PC error-free and secure it is mandatory to scan it on a regular basis. Try the PC Repair Tool.
This is an advanced repair tool that will scan your Windows PC, detect all the errors and solves them automatically.
Errors such as DLL, registry, BSOD, update, game, and others. It also prevents viruses or malware, speeds up the performance of PC, repairs corrupt system files and many more.
Get the PC Repair Tool to Make Your Windows PC Secure.
Conclusion
Here I wrap up my article.
The solutions provided above will surely help you to solve the windows sockets registry entries required for network connectivity are missing issue.
Perform the fixes one after the other and see which one suits in resolving the issue and you are able to connect your system to the internet.
It is expected that you liked this article and it turns out to be useful in resolving your socket error Windows 10 and other queries.
Hardeep has always been a Windows lover ever since she got her hands on her first Windows XP PC. She has always been enthusiastic about technological stuff, especially Artificial Intelligence (AI) computing. Before joining PC Error Fix, she worked as a freelancer and worked on numerous technical projects.
