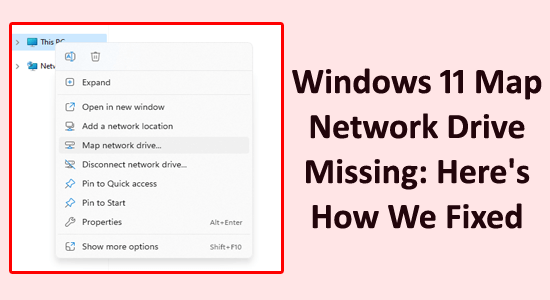
Have you recently upgraded to Windows 11 and noticed that your map network drive is missing on File Explorer? Well, the mapped network drivers are not always consistent and stopped working for many different reasons.
Here in this article, we’ll discuss the common causes of the missing Map Network drive feature, as well as some troubleshooting tips.
To repair corrupted Windows system files, we recommend Advanced System Repair:
This software is your one stop solution to fix Windows errors, protect you from malware, clean junks and optimize your PC for maximum performance in 3 easy steps:
- Download Advanaced System Repair rated Excellent on Trustpilot.
- Click Install & Scan Now to install & scan issues causing the PC problems.
- Next, click on Click Here to Fix All Issues Now to fix, clean, protect and optimize your PC effectively.
What Causes “Windows 11 Map Network Drive Missing”?
- Incorrect Credentials: If the credentials used to map the network drive are incorrect, the drive will not be displayed in File Explorer.
- Unavailable Network Resource: If the network resource is unavailable, the drive will not be displayed.
- Network Connection Issues: If the network connection is not stable, the drive won’t be displayed.
- Incorrect Network Path: If the network path used to map the drive is incorrect, the drive won’t be displayed.
- Group Policy Restrictions: If the system administrator has restricted the use of mapped network drives, the drive won’t appear.
- Firewall Block: If the Windows Firewall is blocking the drive, it won’t be displayed.
- Incorrect Drive Letter: If the drive letter assigned to the network drive is incorrect, the drive won’t be displayed.
- Corrupted System Files: If the system files related to the network drive are corrupted, the drive won’t be displayed.
How to Fix Windows 11 Map Network Drive Missing or Not Showing?
Solution 1: Show Hidden Items in File Explorer
By viewing the hidden content, users can identify and correct any errors or issues that may be preventing the network drive from appearing. Additionally, viewing hidden items may reveal any missing files or folders that must be present for the network drive to be seen. Follow the below instructions to show all the hidden items in File Explorer.
- Press the Windows and E keys together to open File Explorer.
- Now, go to the View tab and click on Show and now, press the Hidden items

- All the Hidden items will be displayed on the screen. Check if the network drive appears in the list.
Solution 2: Run the System File Checker/DISM
Performing a System File Checker (SFC) or Deployment Image Servicing and Management (DISM) scan to detect and repair corrupted system files or missing components and replace them with healthy versions.
Additionally, DISM can repair Windows image files and can help to restore any system components that may be preventing the Map Network Drive from functioning properly.
- Press the Windows + R keys to launch the Run dialog box.
- Now in the Run box, type cmd and hit Enter.
- Once the command prompt opens type sfc/scannow and hit Enter.

- Wait until the SFC scanning process to complete. It takes around 15 minutes approximately.
- Once the scanning process is completed, check if the issue is resolved. If you still face the error, then run the DISM command in the command prompt.
- Open the command prompt again and type dism /online /cleanup-image /restorehealth and hit Enter
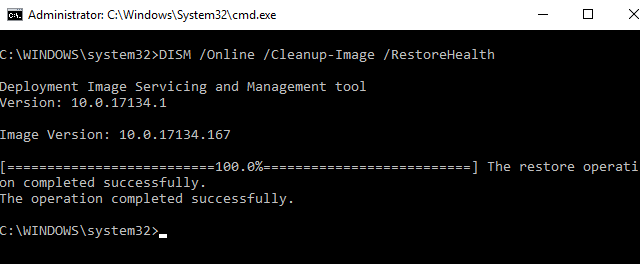
- Wait until the DISM scanning process to complete. It takes around 30 minutes approximately.
- Check if the issue is resolved now after restarting your system.
Solution 3: Configure Proxy and SMB to Recognize the Network Drive
Proxy and SMB are both important protocols used to access network resources. Configuring them correctly can help to resolve issues with Network Drive on your PC.
Proxy is used to control access to the internet, while SMB is used to share files and printers on a network. By configuring both of these protocols correctly, the network will be able to access the network resources it needs to locate the missing drive. Follow these steps to configure the proxy and SMB (Server Message Block protocol) on your PC.
- Open Settings on your PC and navigate to Network & Internet.
- Then, click on Proxy to enable it.

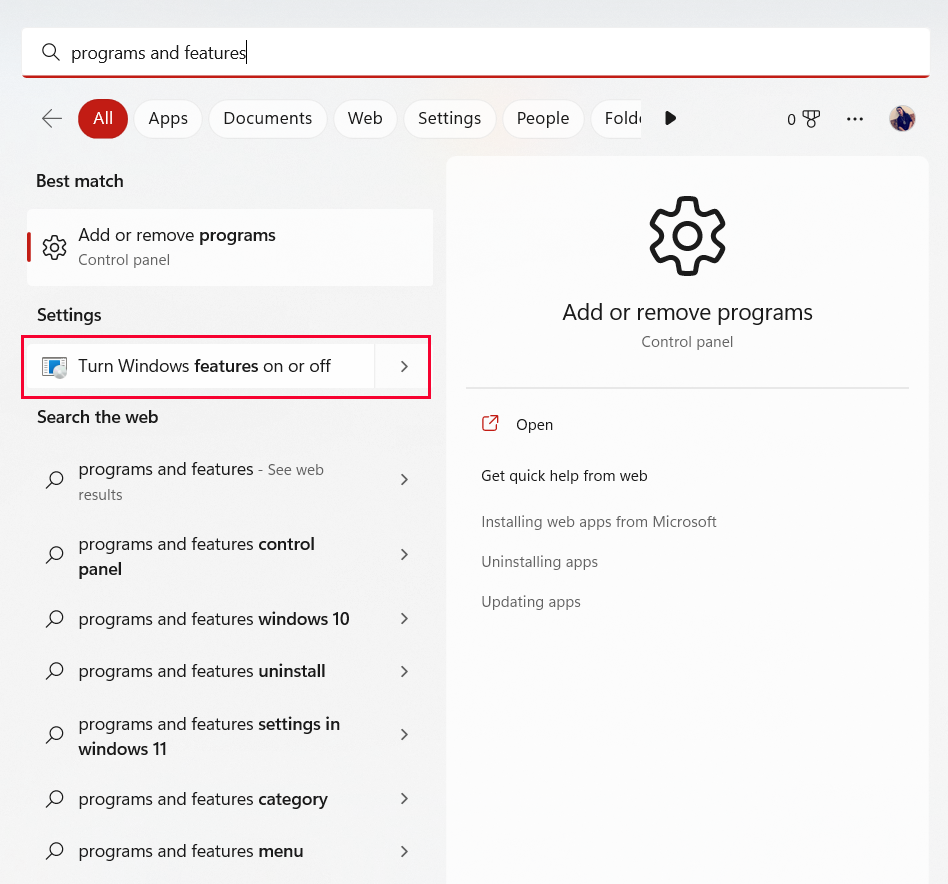
- Now, search box type programs and features.
- Then, click on Turn Windows features on or off to launch the Windows Features
- Scroll down the list and locate the features that start with SMB. Ensure that all the SMB folders are checked.
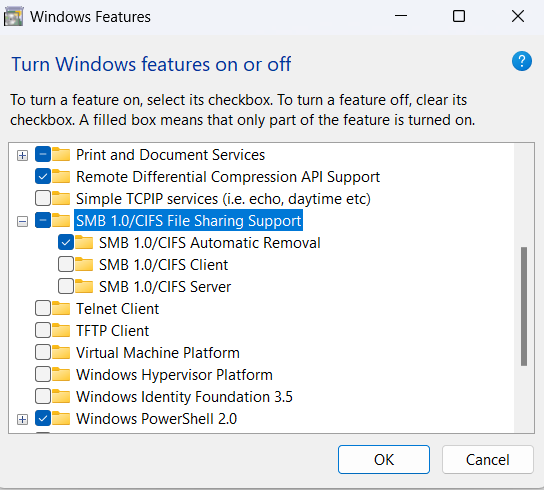
- Then, click on OK.
- Restart the computer to save the changes and check if the issue is resolved now or not.
Solution 4: Map a Network Drive with Command Prompt
This allows you to specify a target drive and path to the network resource you want to access. And makes it easier for you to connect to the network resource without having to manually browse the network each time.
Furthermore, it can help to fix any connection problems that may exist, such as incorrect credentials, incorrect server names, and incorrect paths.
Additionally, mapping a network drive with Command Prompt allows you to easily access and manage your network resources from the command line. This can be a huge time saver for users who need to access and manage multiple network resources.
- Hit the search box type cmd.
- Now, open the Command Prompt and type the given command and hit Enter. This command will map the shared folder to Z: and you can access the network drive in File Explorer.
net use z: \\remote_ip\shared_folder /persistent:yes
Note: Replace remote_ip and shared_folder with your PC’s IP address and the shared folder’s name respectively.
- If you wish to disconnect the network drive, you can run this command net use z: /delete
Solution 5: Manually Update your Drivers
Outdated drivers can cause various issues, such as networking and compatibility issues. By updating the drivers, you will ensure that the system is optimized for the latest version of Windows and allow the related services to function properly.
Follow these steps to update the drivers on your PC.
- Press the Windows key and type Device Manager. Then, tap on Open to launch it.
- Double-click on the drivers, check if any drivers need any updates, and make a note of them.
- Then, go to the manufacturer’s website and download the driver that suits your system specifications.
- The .exe files will be downloaded to your computer. Run the files by double-clicking on them to install the drivers.
In addition, you can also update the driver using the Driver Updater tool. Driver Updater can automatically detect outdated, missing, or mismatched drivers, and download and install the correct versions of the drivers right away.
Get Driver Updater to Update Drivers Automatically
Solution 6: Update Windows Operating System
Updating Windows OS addresses issues with the system files, drivers, and security settings that could be causing the issue. It can also install any necessary updates for the software and drivers related to the network drive and provide better compatibility with the current version of Windows.
Additionally, updating the OS can help to eliminate any bugs or glitches that may be causing the issue, and can help to improve the overall performance of the system. Follow these steps to update Windows OS to the latest version.
- Press the Windows + I keys together to launch your Settings.
- Click on the Windows Update option in the left pane.

- Go to the right screen, and click on Check for updates.
- If you find an update available, click on the Install now option to update to the new version.
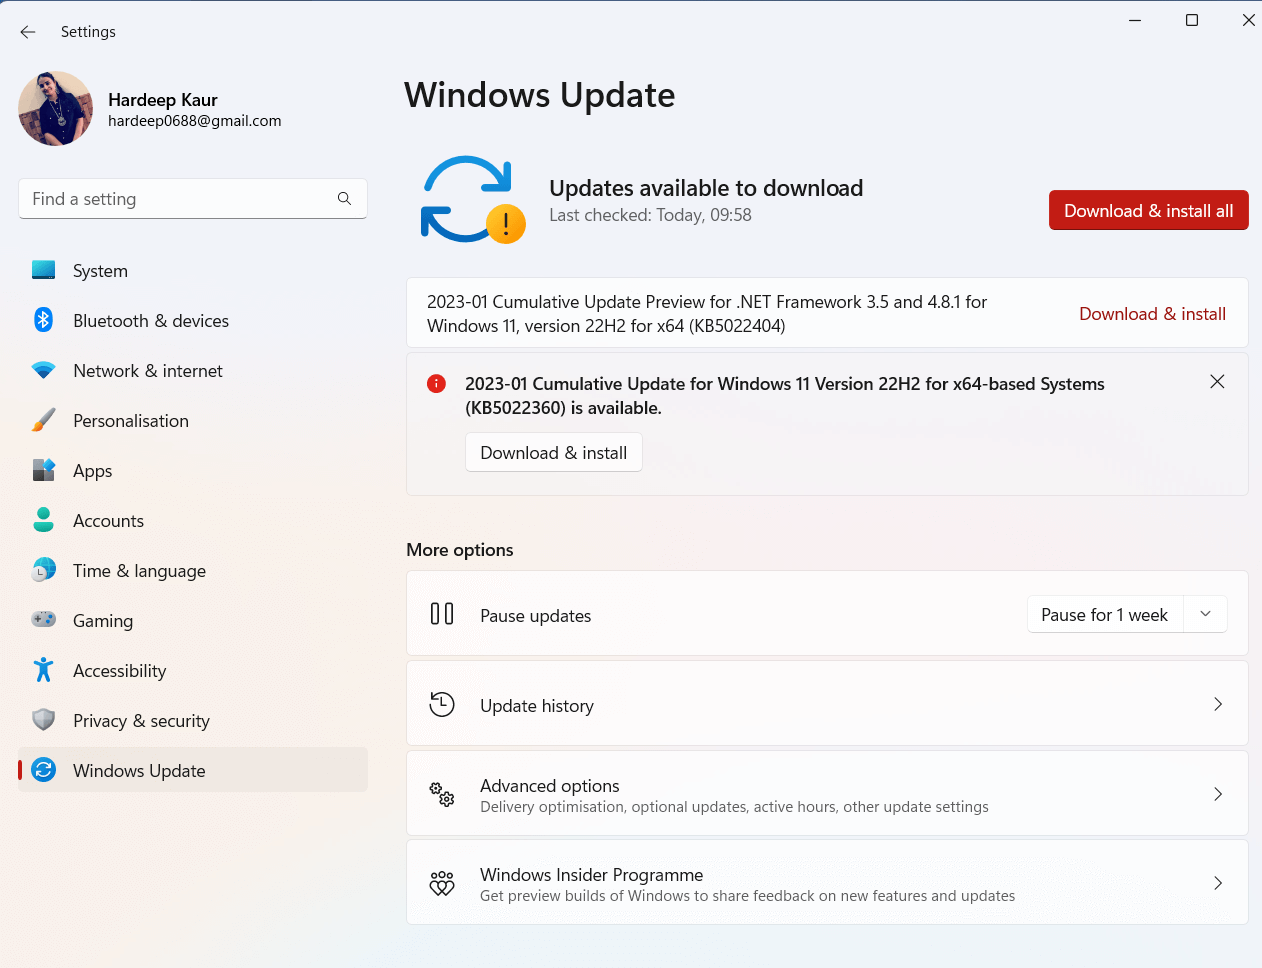
- If the Windows 11 OS is already updated, you will get You’re up to date
- After updating the device, restart your PC and check if the issues with the Map Network Driver are resolved on your system.
Solution 7: Modify your Registry
By changing the registry values, the user can customize the behaviour of the feature, such as the network drive letter assigned, the network drive path, and the user permissions associated with it. The registry keys can also be used to fix any conflicts or errors associated with the feature. Follow these steps to tweak the Registry keys on your PC to fix the issue.
- Open the Run dialogue box (press Windows + R keys) and type regedit.

- Then, click on OK to launch the Registry editor.
- Navigate to the following location.
HKEY_LOCAL_MACHINE\SOFTWARE\Microsoft\Windows\CurrentVersion\Policies\System
- In the left screen, find and right-click on the System key, and click on New -> DWORD (32-bit) Value.
- Now, double-click on the key to modify it. In the Value data field, type 1 and click on OK.
- Once you restart your PC, the network drives will be visible in File Explorer now.
Recommended Solution- Fix Various PC Issues & Errors
If your Windows PC/laptop system is running slow or showing various issues and errors, then scan your system with the PC Repair Tool. This is a powerful repair tool that, just by scanning once, detects and fixes various Windows issues and errors.
The tool fixes common PC errors like system file corruption and protects from file loss, malware, hardware failure, BSOD error, and more.
Well, this not only fixes errors but also enhances Windows PC performance.
Get PC Repair Tool to Fix Various PC Issues and Errors
Conclusion:
Thus, by following the above solutions, fixing a missing Windows 11 Map Network Drive is quite simple.
Follow the step-by-step instructions and easily map a network drive and access it from any computer connected to the same network.
Hope our article works for you to solve the problem.
If there is anything I missed out or you have any queries, then please drop them on our Facebook Page. Also, don’t forget to follow us on our social media handles to get more interesting guides and helpful tips to keep your computer safe from errors and issues.
Good Luck..!
Hardeep has always been a Windows lover ever since she got her hands on her first Windows XP PC. She has always been enthusiastic about technological stuff, especially Artificial Intelligence (AI) computing. Before joining PC Error Fix, she worked as a freelancer and worked on numerous technical projects.